Note: this is an old article from 2010 that I posted on the Geo Metro Forum. It is kept here because people keep asking for it. I hope it’s useful!
The '89 Geo Metro has a strange way of dealing with the front brakes, and requires a special tool to remove the hub: The slide hammer. You may be able to borrow this tool from an auto parts store, but the deposit price will likely be over 100$.
If you can, you are much better off replacing the whole knuckle assembly with one from a newer Geo. Apparently they are entirely swappable, no extra parts required. The advantage of doing this swap is that the newer model doesn’t require removal of the hub every time you need to remove the rotor discs. Additionally, I have heard that the new discs are slightly larger, giving increased stopping power.
However… if you want to keep your existing brake system, follow along and I’ll show you how!
Note: All images are clickable, and link to a larger version.
Collect the Tools and Parts #
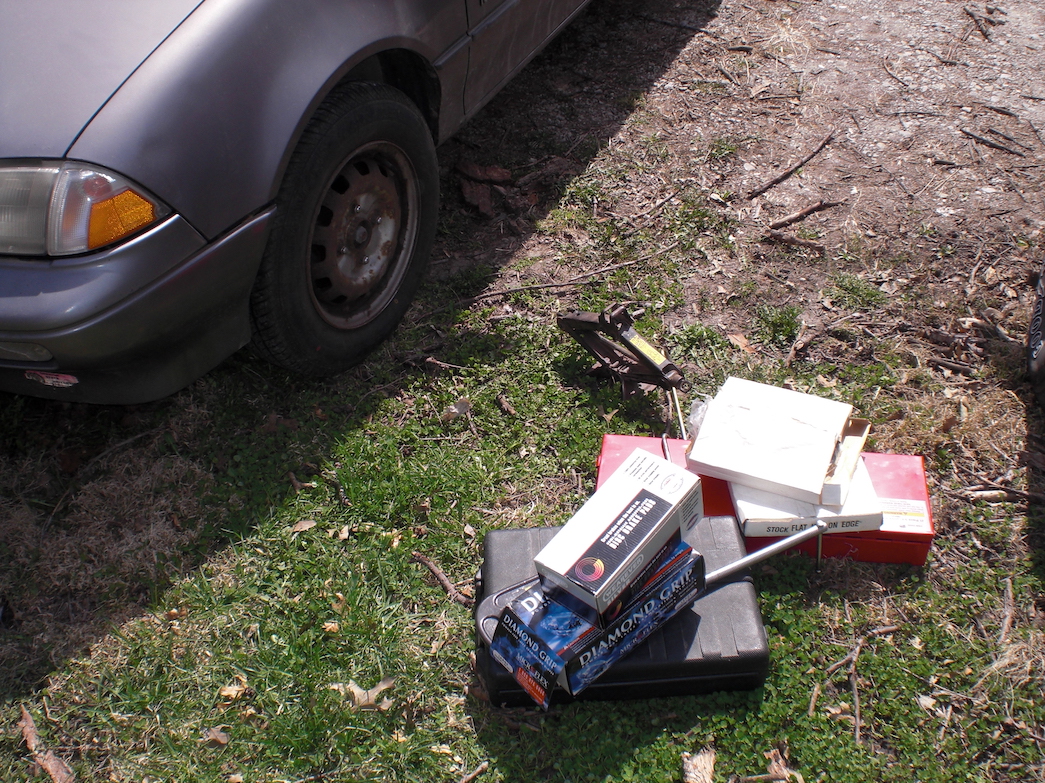
- Make sure to get your brake pads and discs before you start ;)
- 30mm Socket and wrench (you could maybe get by with a 3/4" wrench and a cheater bar, but don’t blame me if you break it! I used a 1" wrench!)
- 14mm socket
- 12mm socket
- Wrench for those (obviously)
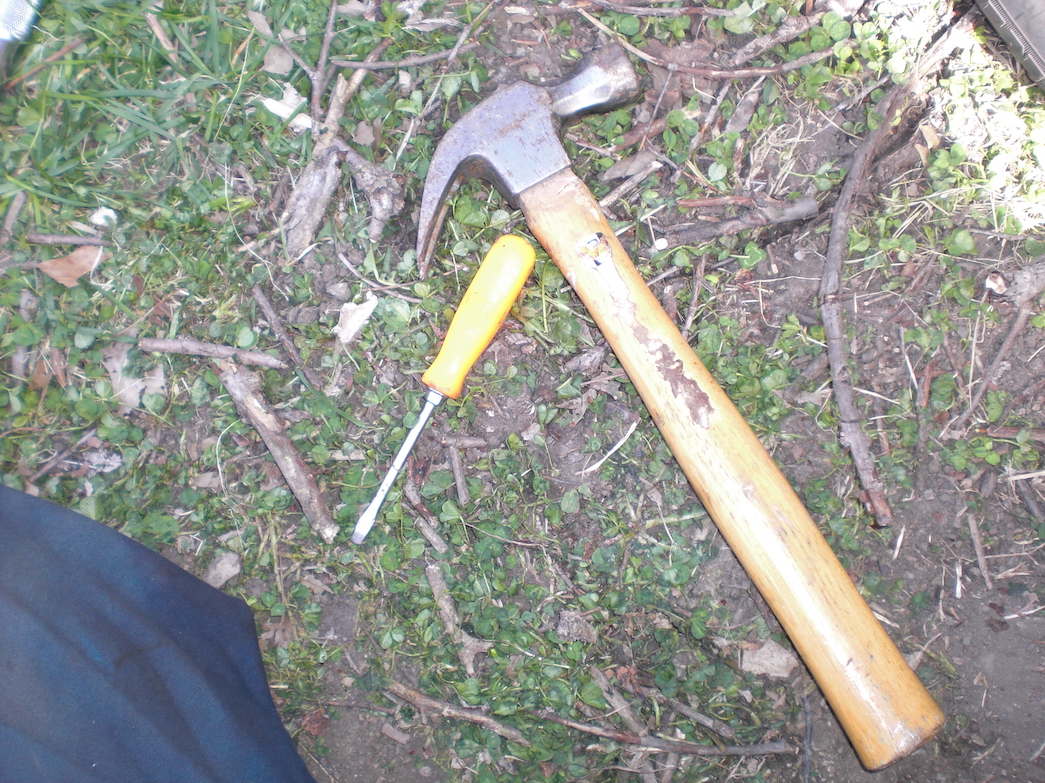
- Hammer and screw-driver-esque thing (see the pretty nearly end step)
- Car jack and wrench (a 17mm socket also fits the lug nuts)
- Jack Stand
- A big C-clap to compress the caliper piston
- That’s it!
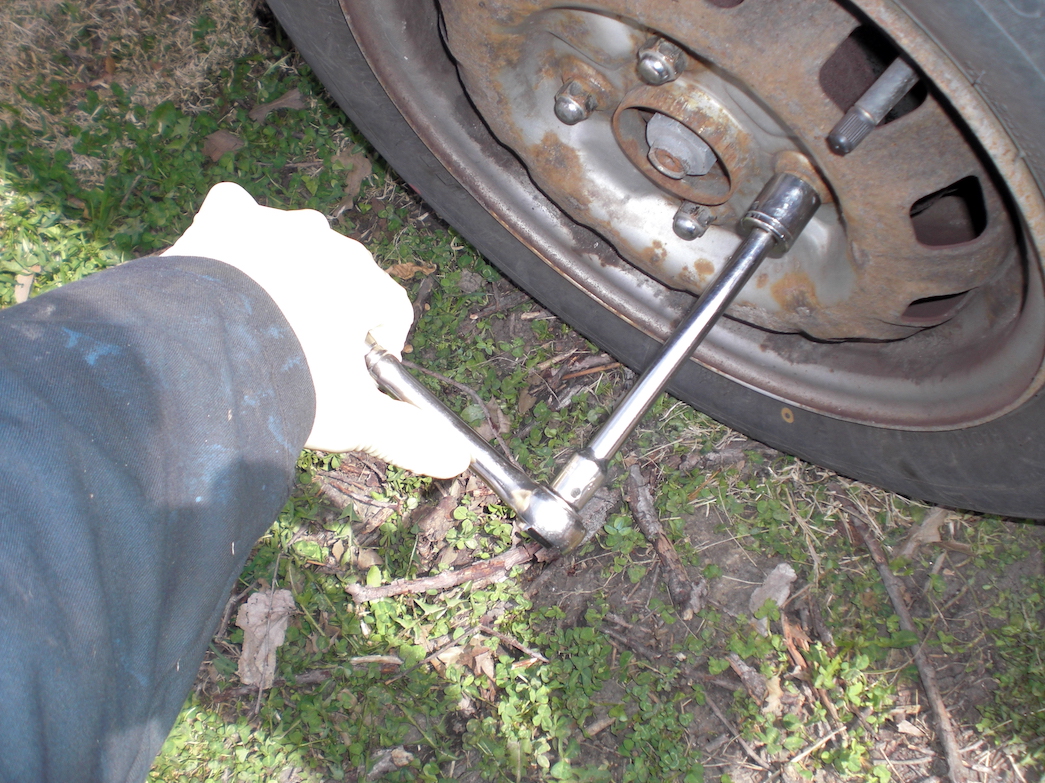
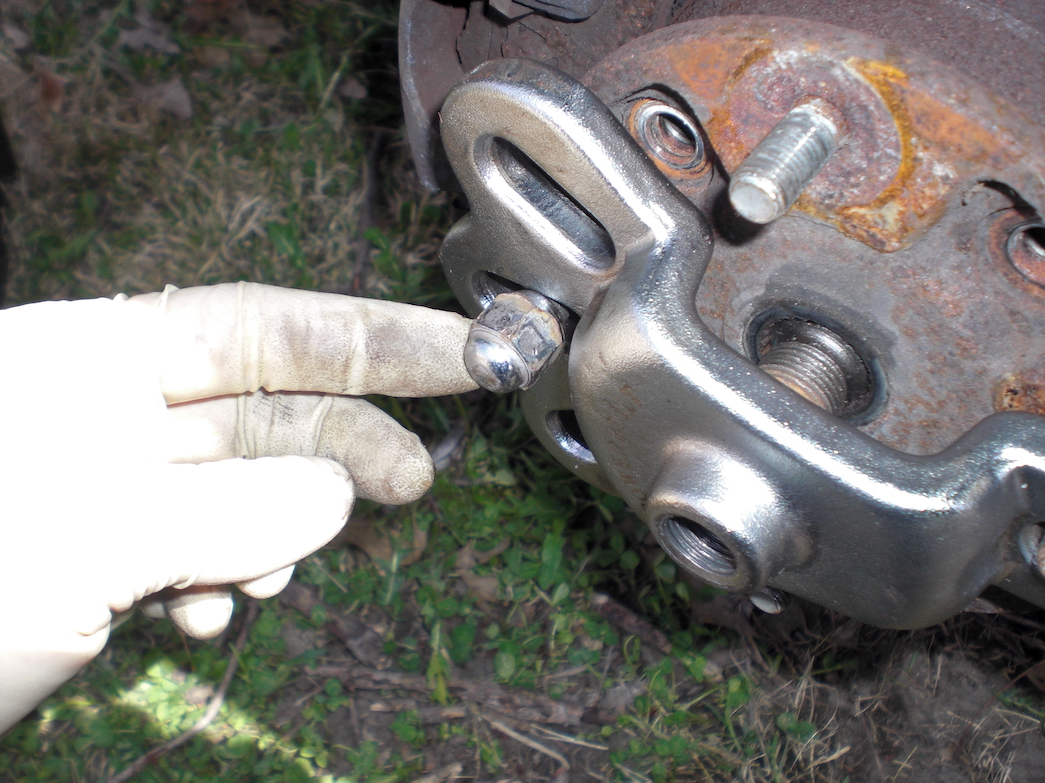
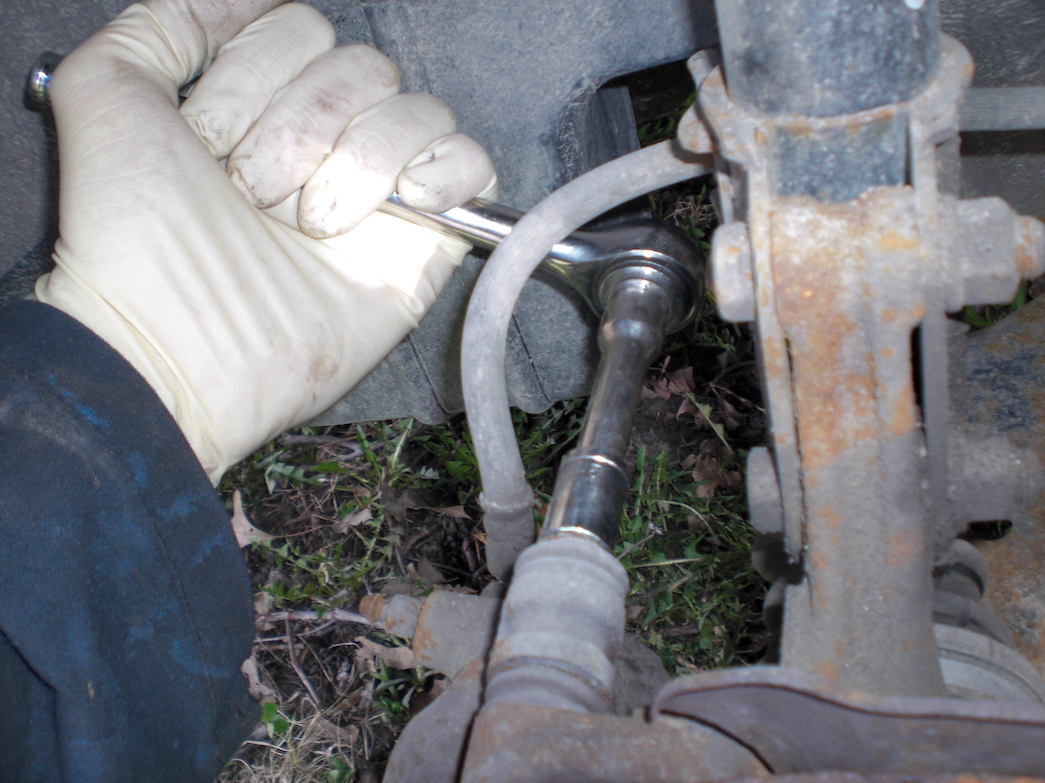
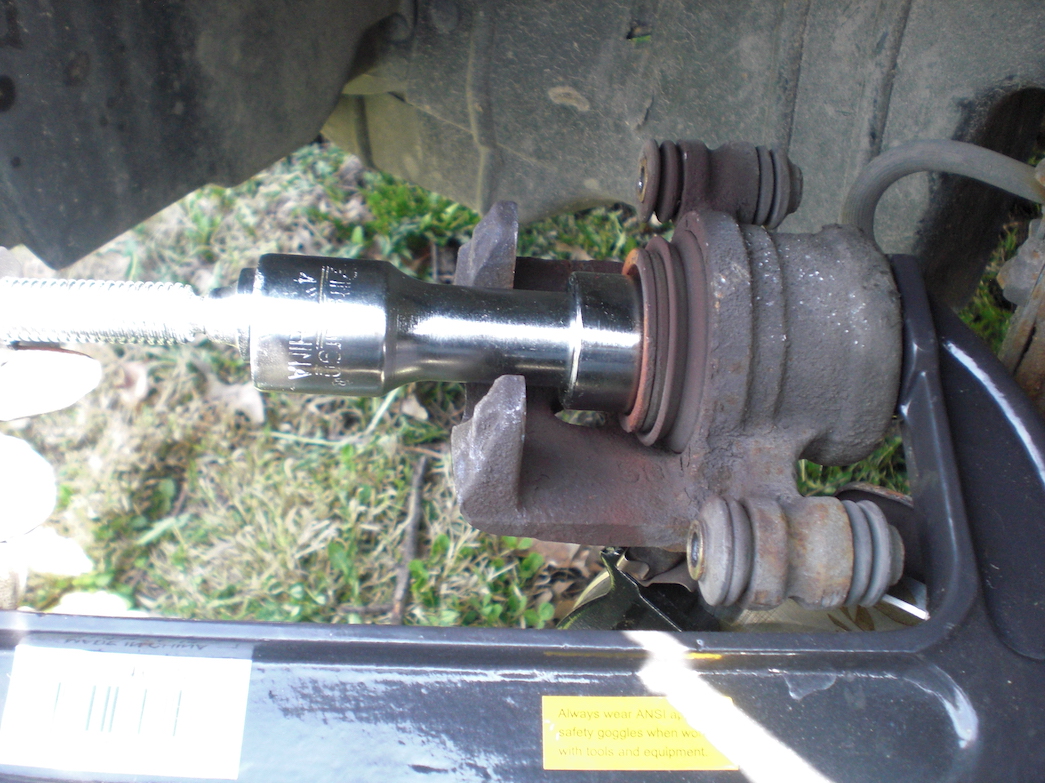
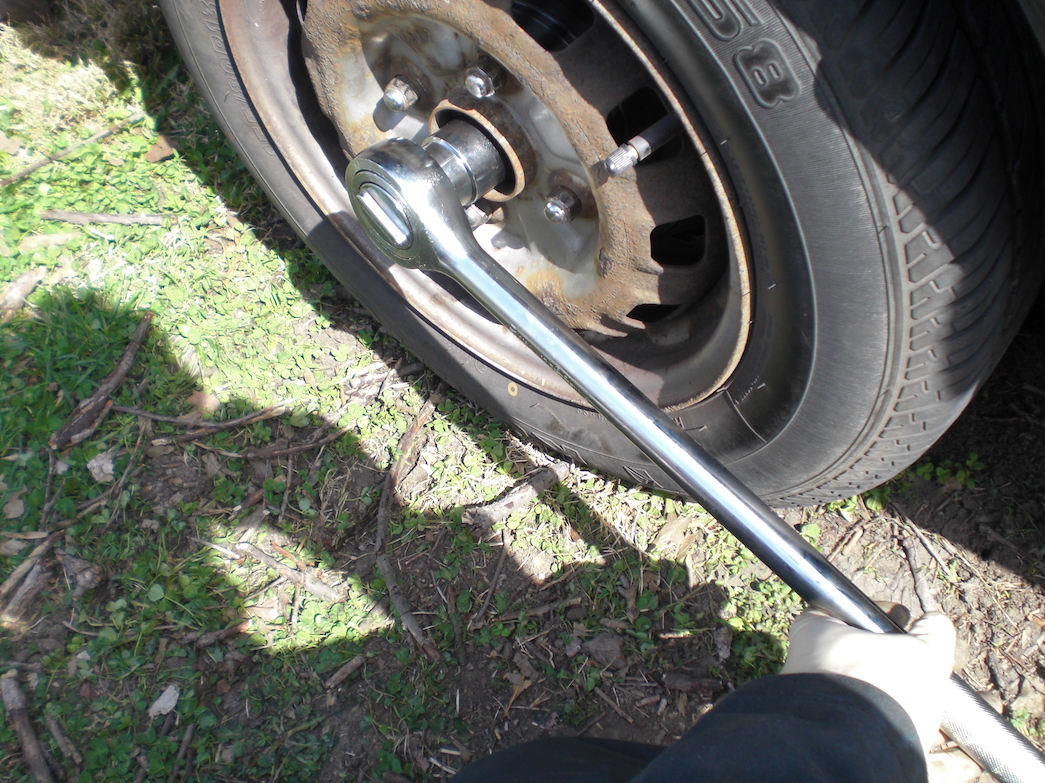
Remove the shaft nut #

Before you jack the car, remove this big shaft nut using the 30mm socket.
Set the emergency brake #
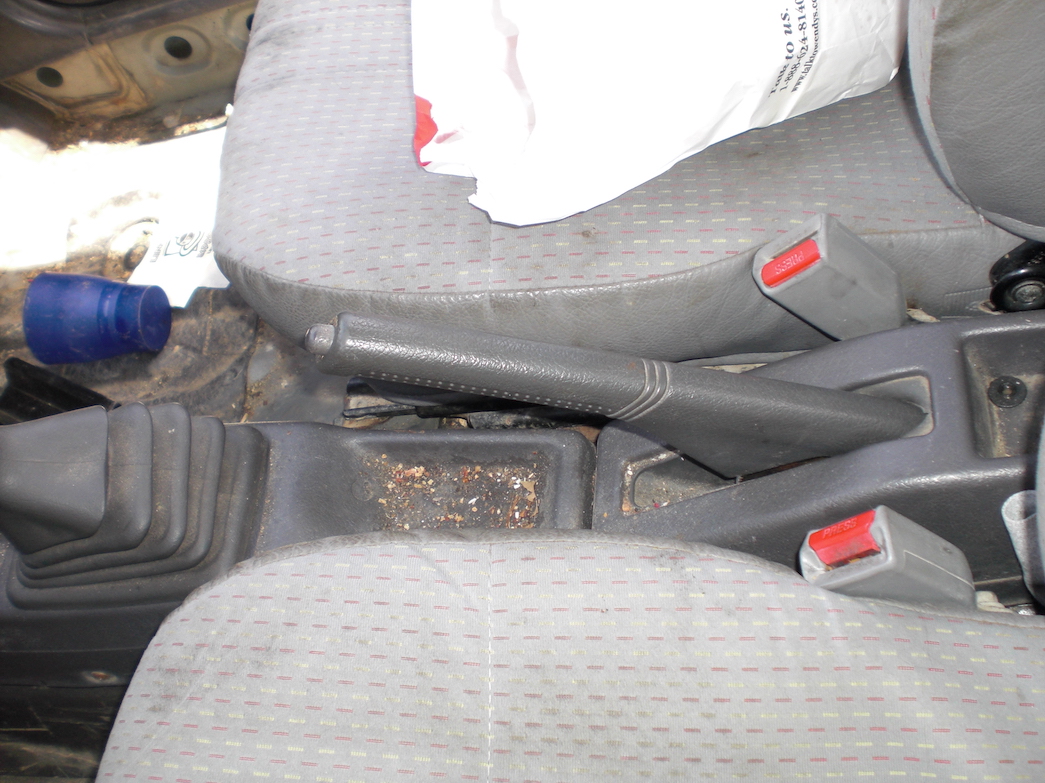
Seriously, you are going to be shaking the car around so bad, set the emergency brake nice and firm.
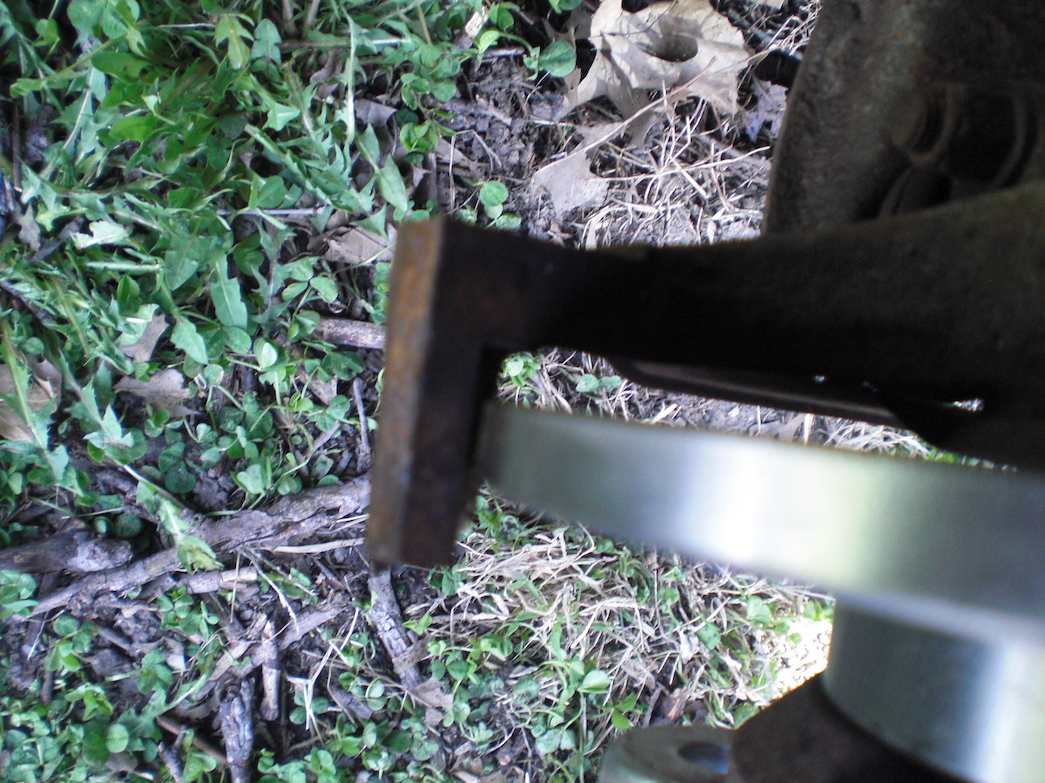
Jack the car #
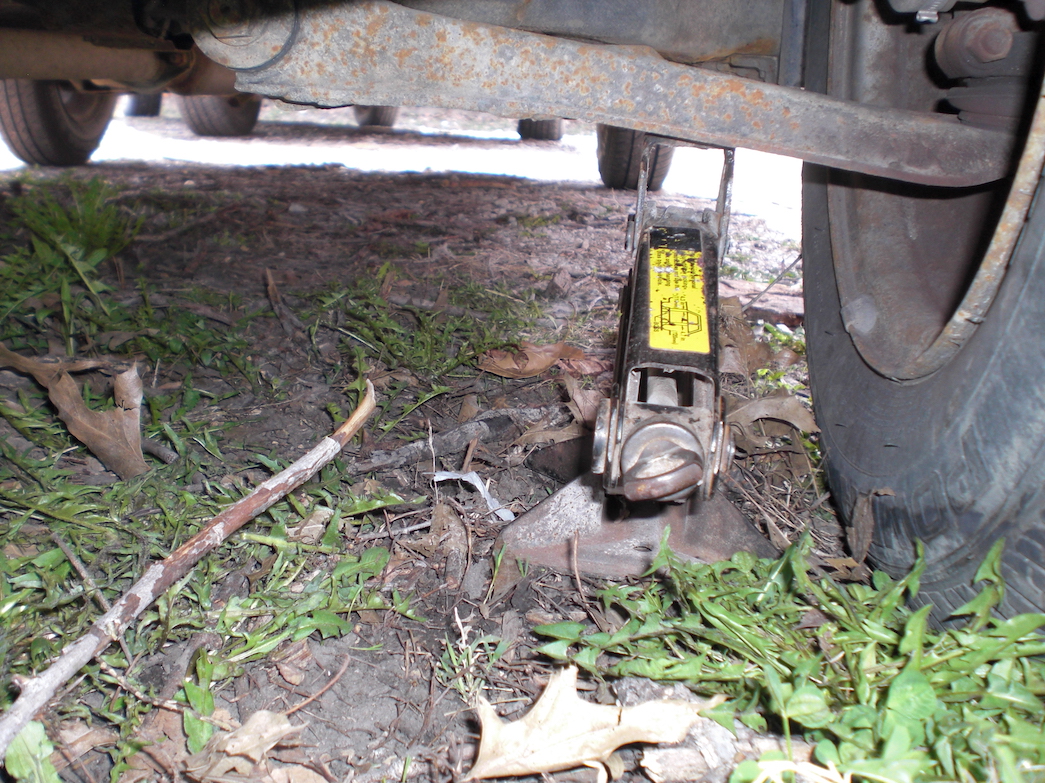
Raise the jack until the front tire is just off the ground and can rotate freely. This is where I set my jack–I don’t set it on the body/frame like the manual says, because the frame is usually so rusted it starts to poke through. Or the sheet metal is so thin it makes a big dent in it.
Note: You should put some jack stands under the car now, especially if you are on soft ground. I didn’t, but I am stupid about safety and forgot. Don’t be stupid about safety, it’s not worth it.
Put on the gloves #
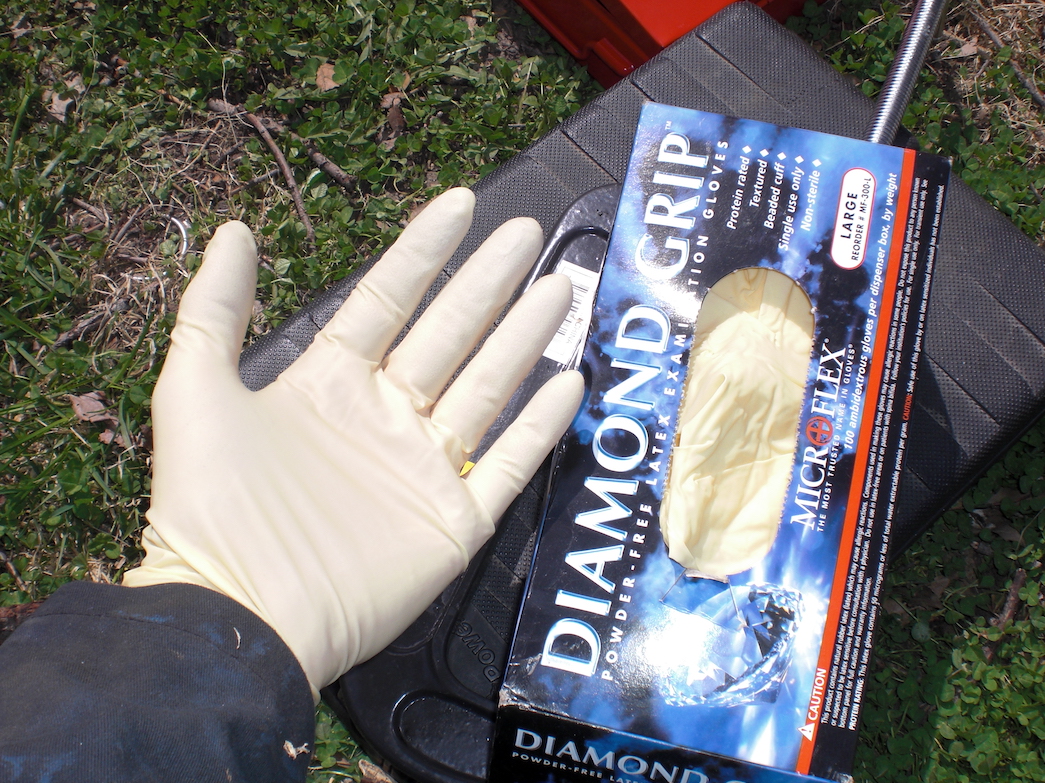
I know, this wasn’t in the tool list. But seriously, I just started using these gloves and it changed the way I work. They’re just some latex work gloves, I got them at the auto parts store for about 14$ for 100 gloves. Doing this whole project I only used one pair, in replacing a head gasket on a Dodge Dakota I used about 12. At the end of working: No scrubbing those hands anymore, they are clean right away! Seriously, get these and you will not regret it. Best tool I’ve bought in years.
Remove lug nuts #
Using the tire iron (or in my case, the 17mm socket) remove the lug nuts by breaking each nut loose and then removing them. If the car drops after you break the nuts free, you didn’t lift the car high enough!
Remove tire #
Remove the tire carefully, so as not to bang up the threads on the studs (bolts).
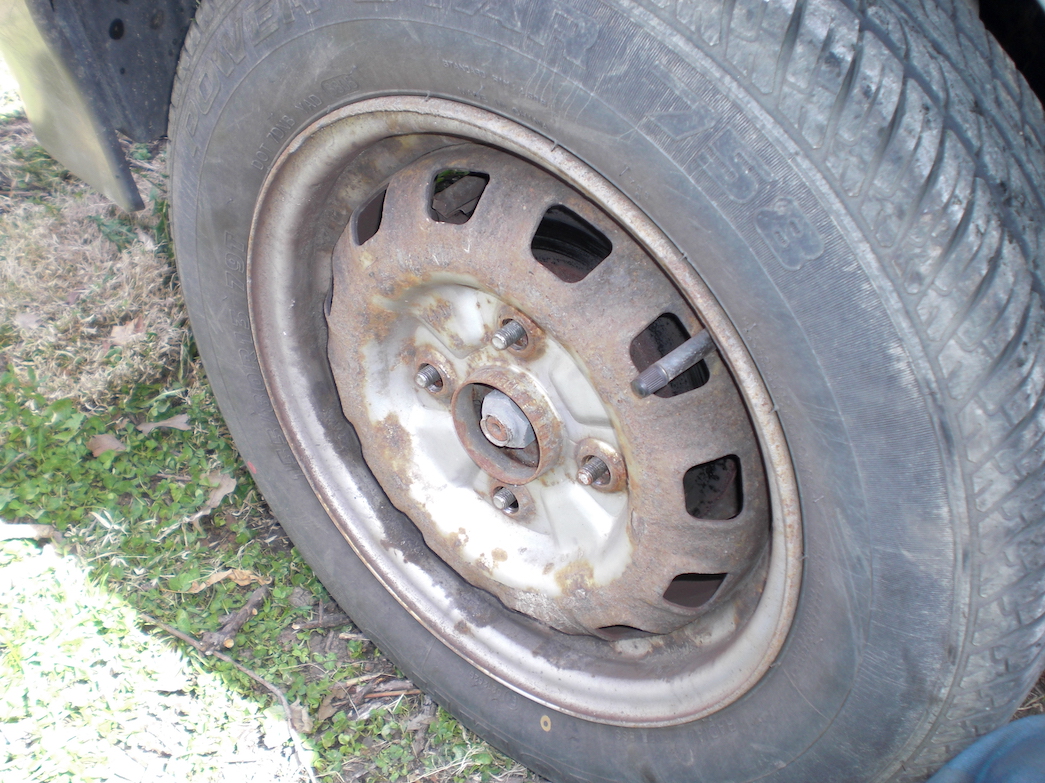
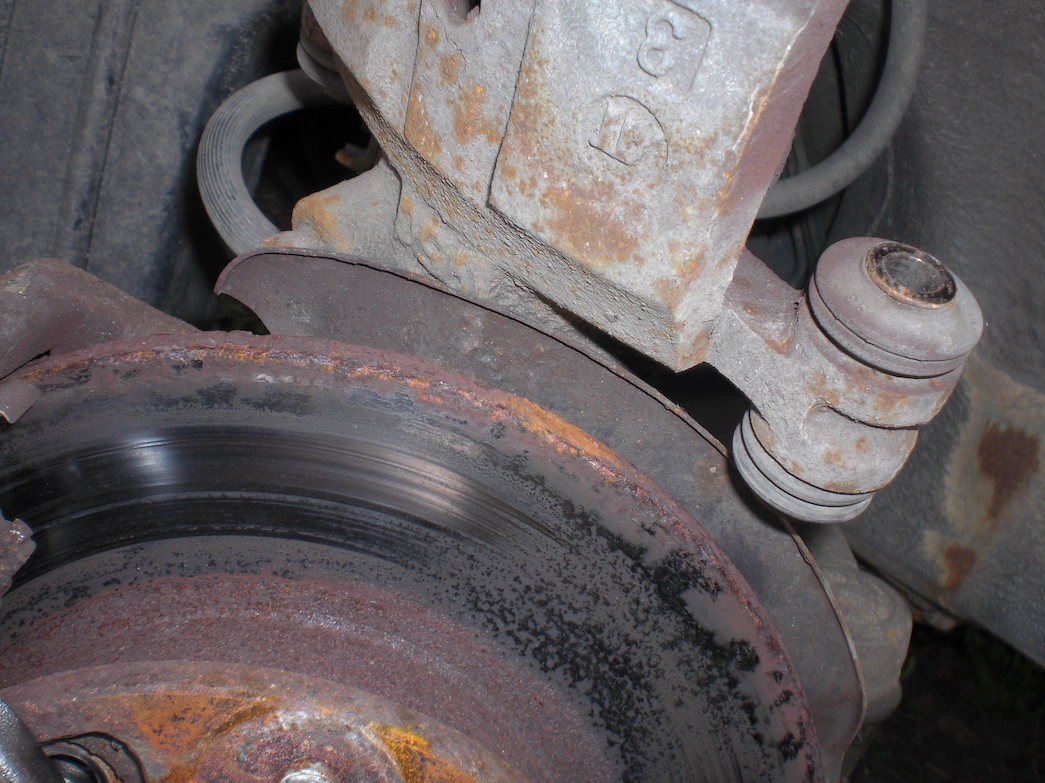
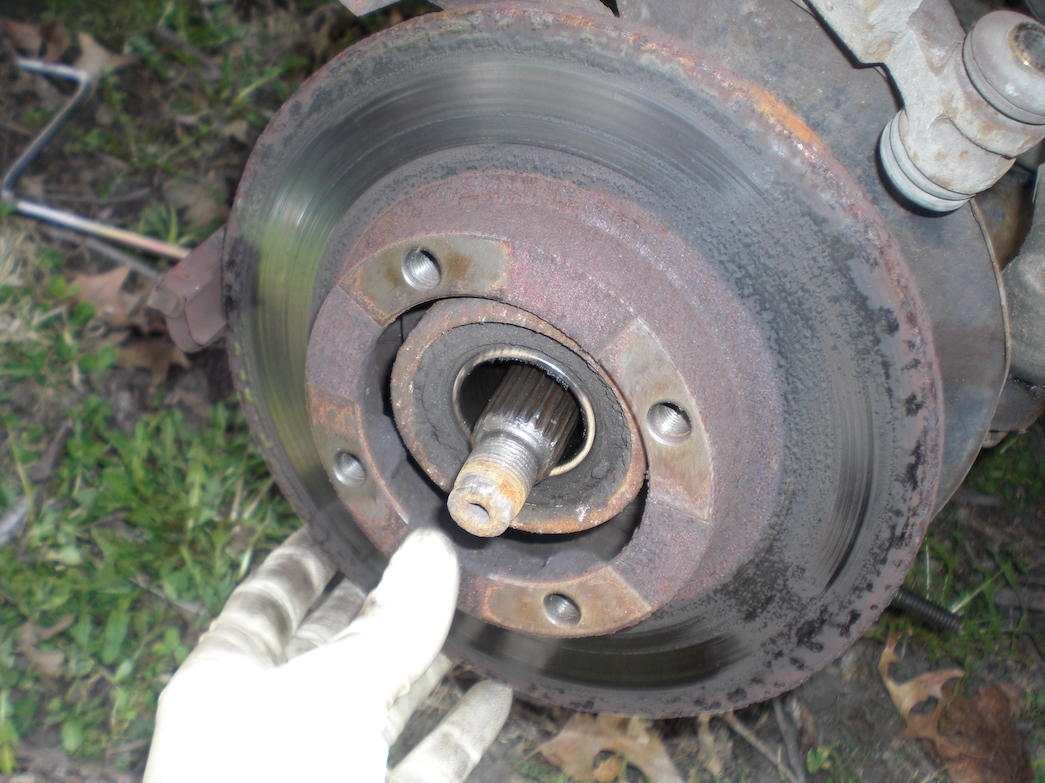
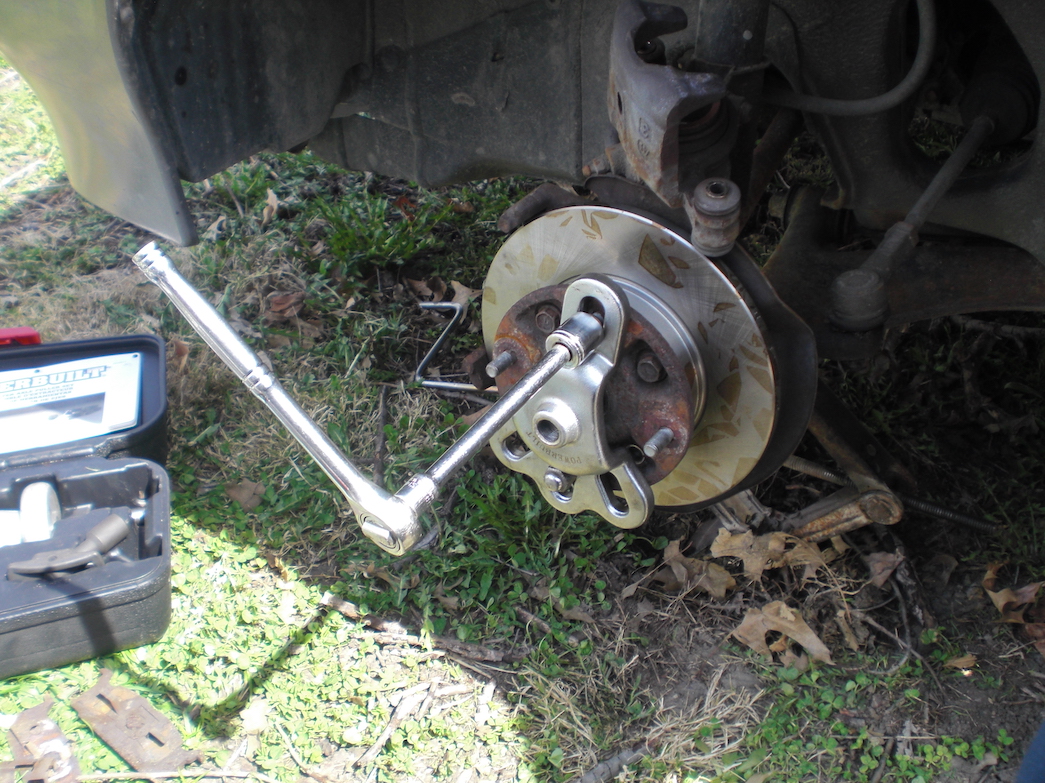
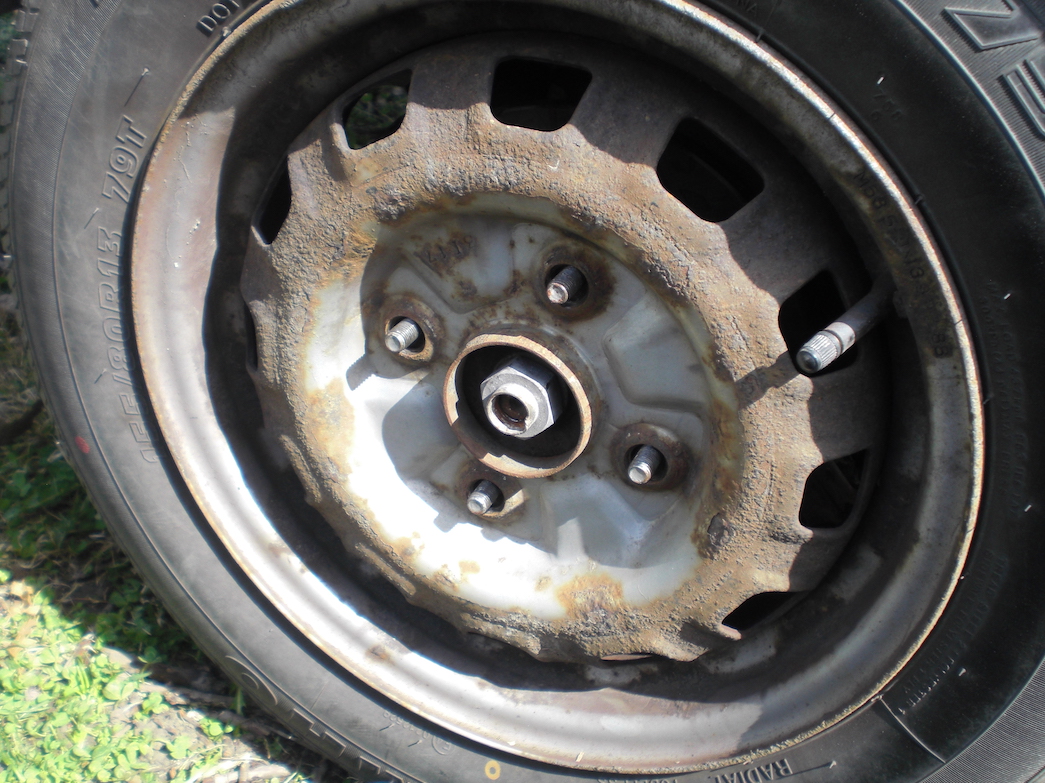
The plan #
This is the hub. It has to come off so you can get the disc rotor off and replace it. To do that, you need to remove the brake caliper completely, then attach a slide hammer to the hub and hammer away until the hub comes off. Installation is basically the reverse. Read on for the important details.
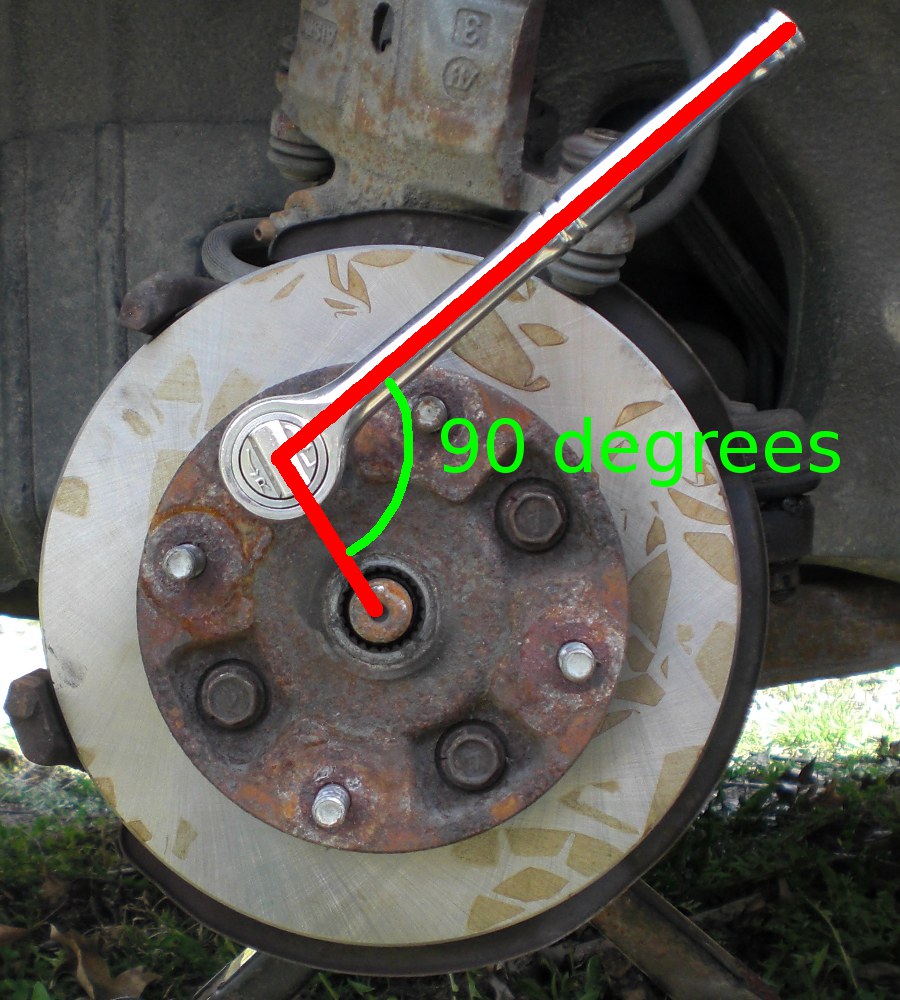
Mark the center of the disc #
The manual says to do this, and it makes sense: When you put the hub back in, you need to know where to stop. Put a mark on the caliper holder arm, right in the center of where the disc is (click for a bigger picture with better detail):
Remove hub bolts #
Using the 14mm socket and wrench, remove these four bolts. If the hub keeps turning, you might have somebody sit in the drivers seat and step on the brakes. Note: If you do, remember that the car is on a jack! Move slowly!

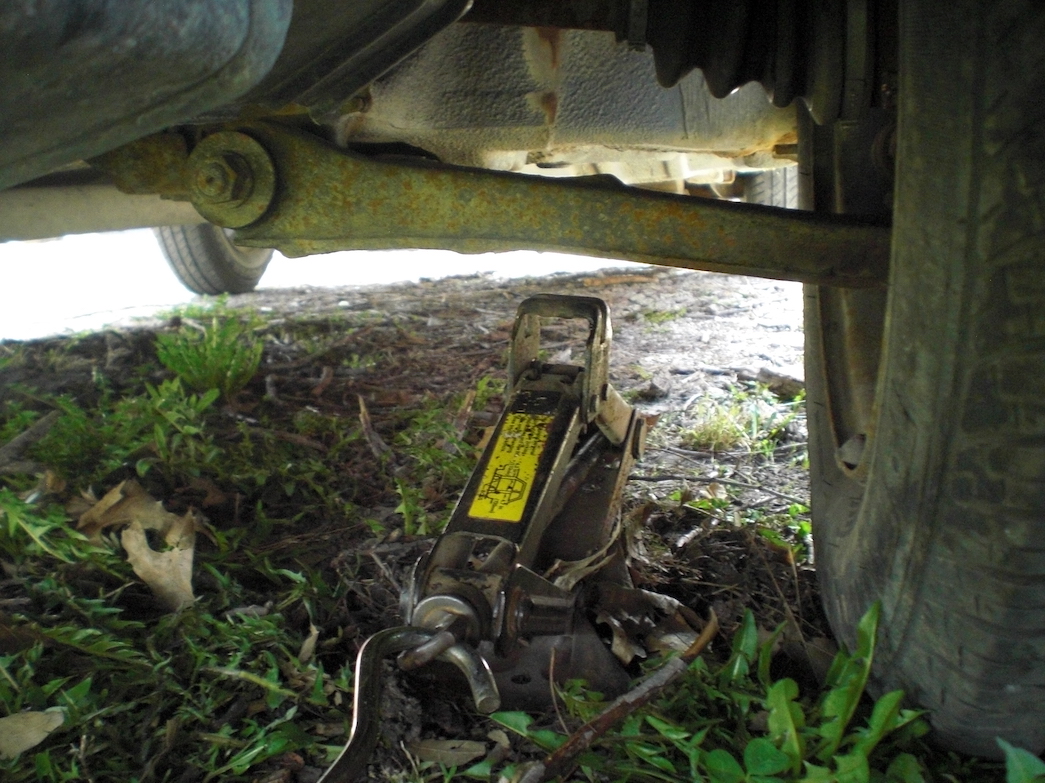
This is what happens when you start jerking the car around! Thankfully it didn’t slip too far, or else I would have been stuck: The scissor jack that comes with the car is insufficient to jack the car from the ground, and if you try you will likely ruin your jack.
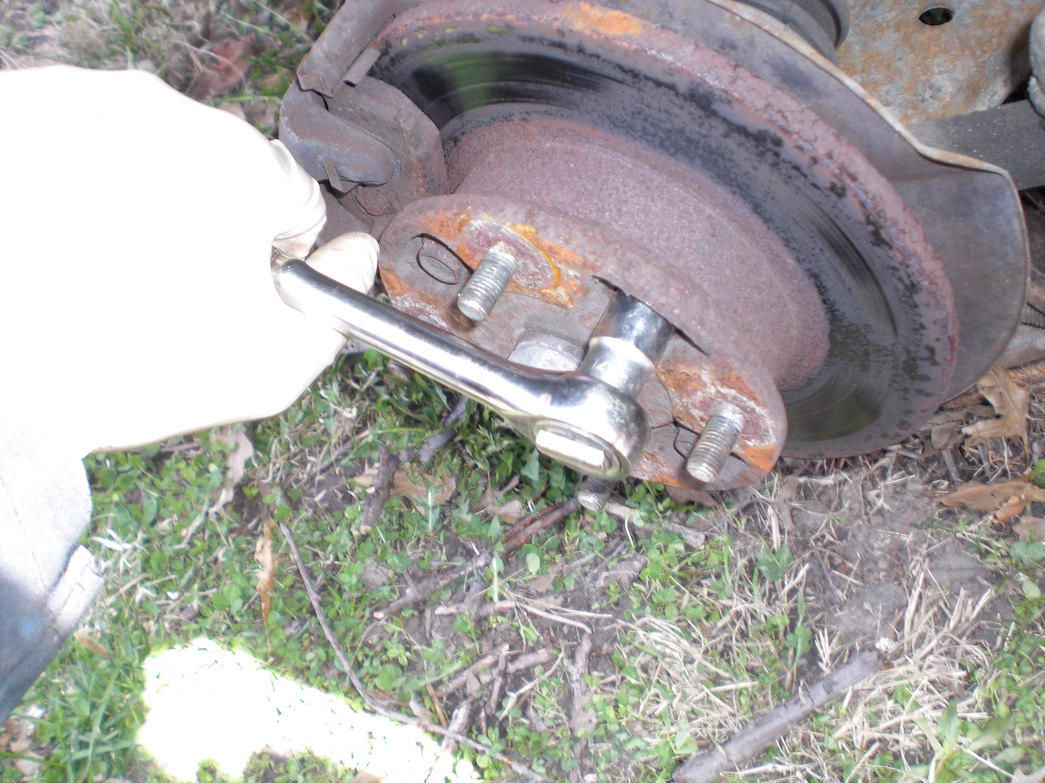
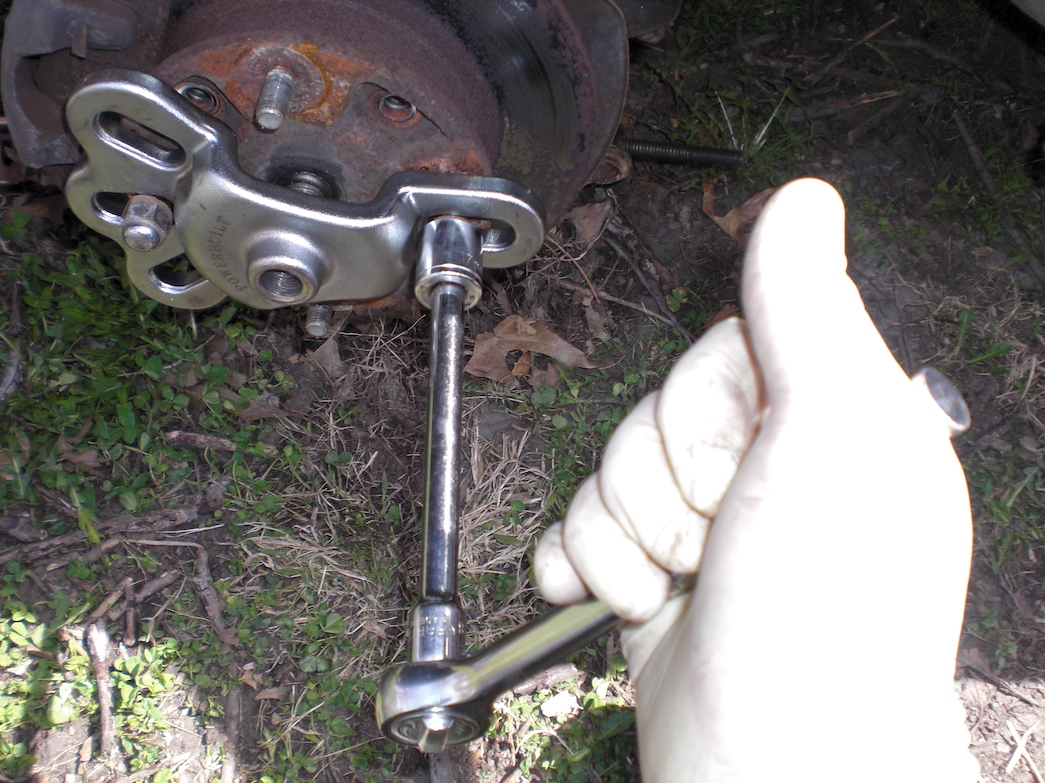
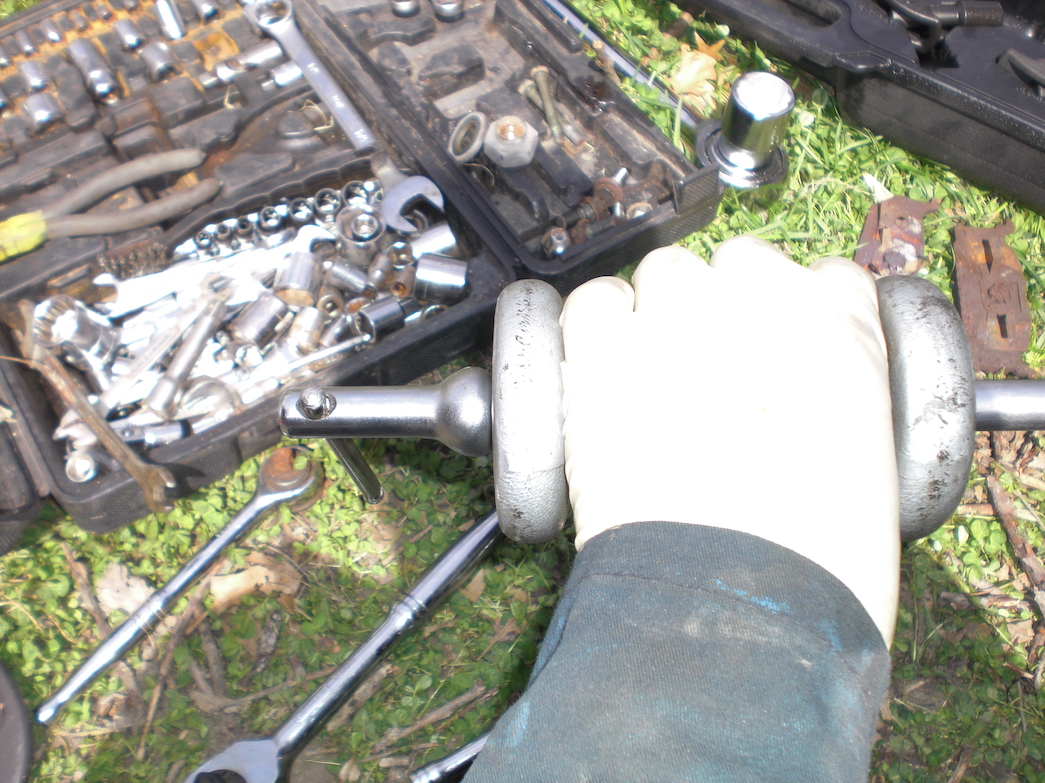
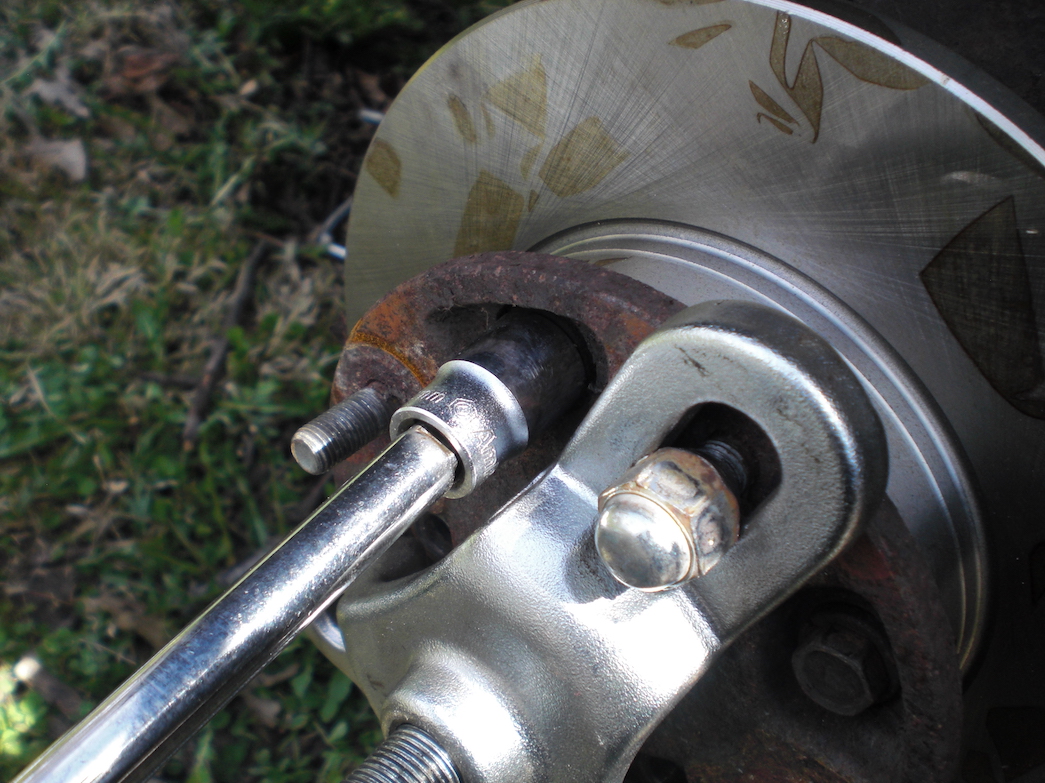
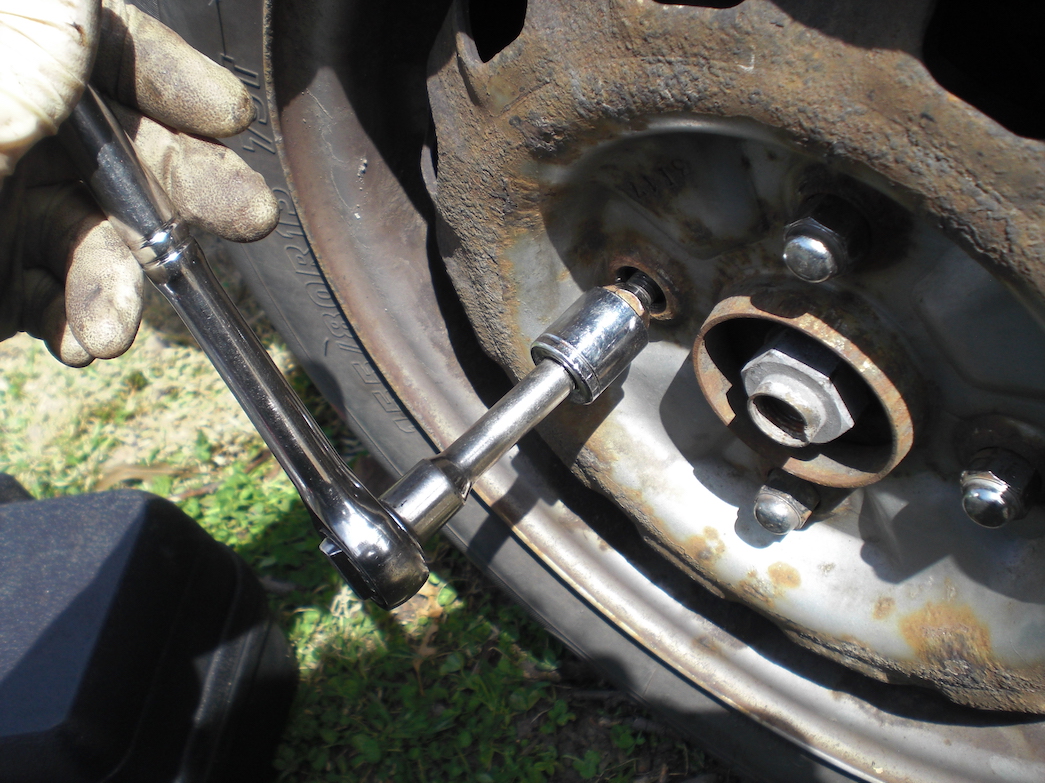
Extra tip: If you haven’t figured it out by now, set the wrench up like this:
This directs the entire force to turning the bolt, instead of turning the hub.
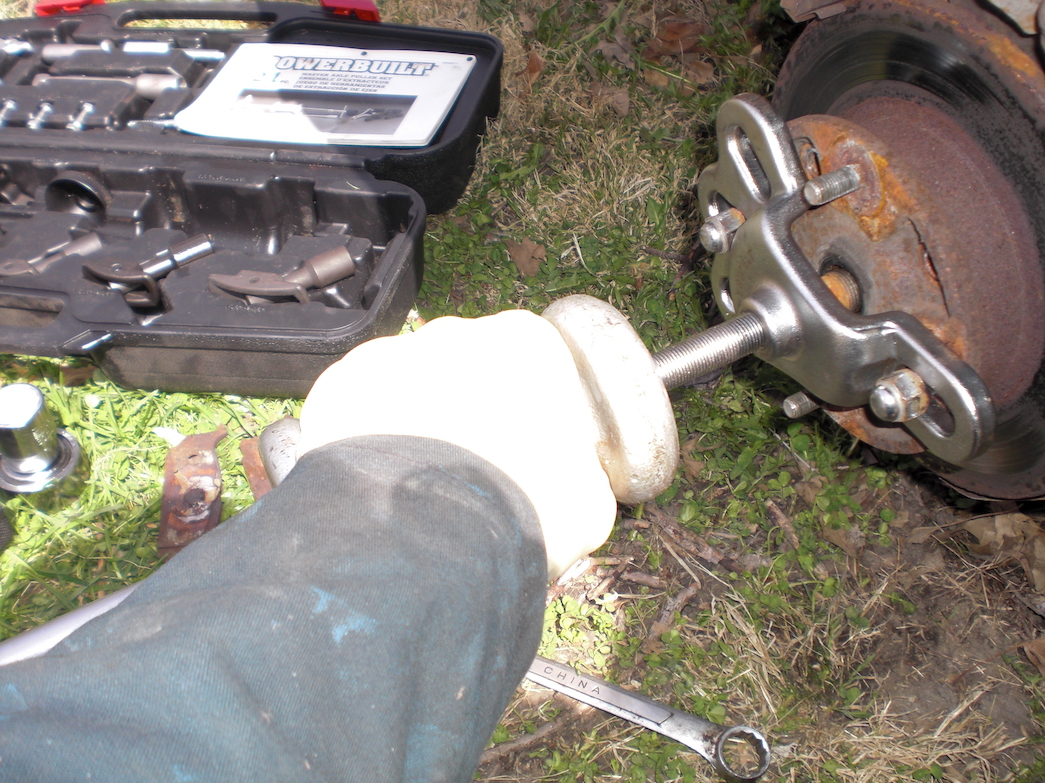
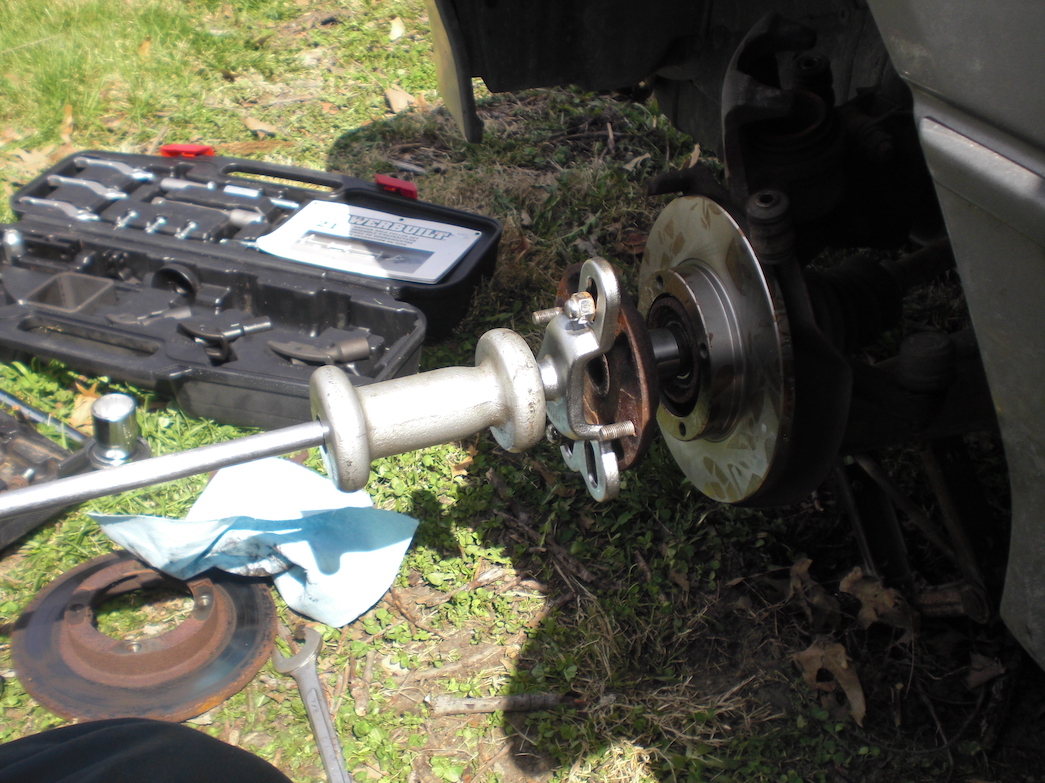
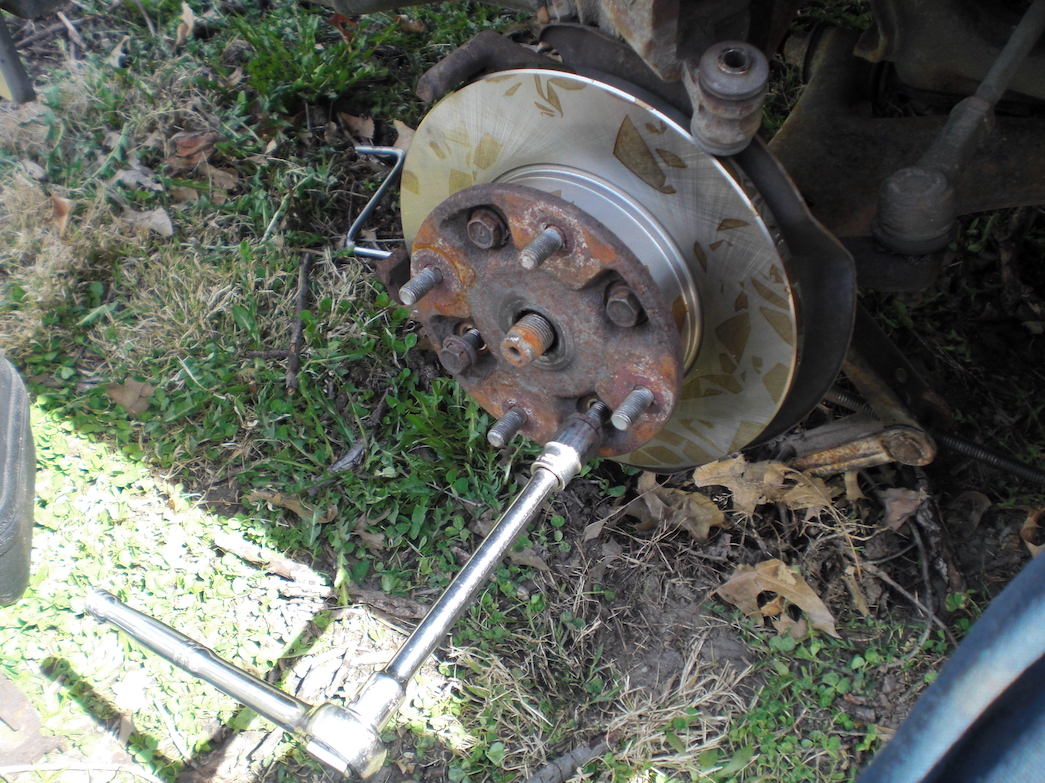
Setup the slide hammer #
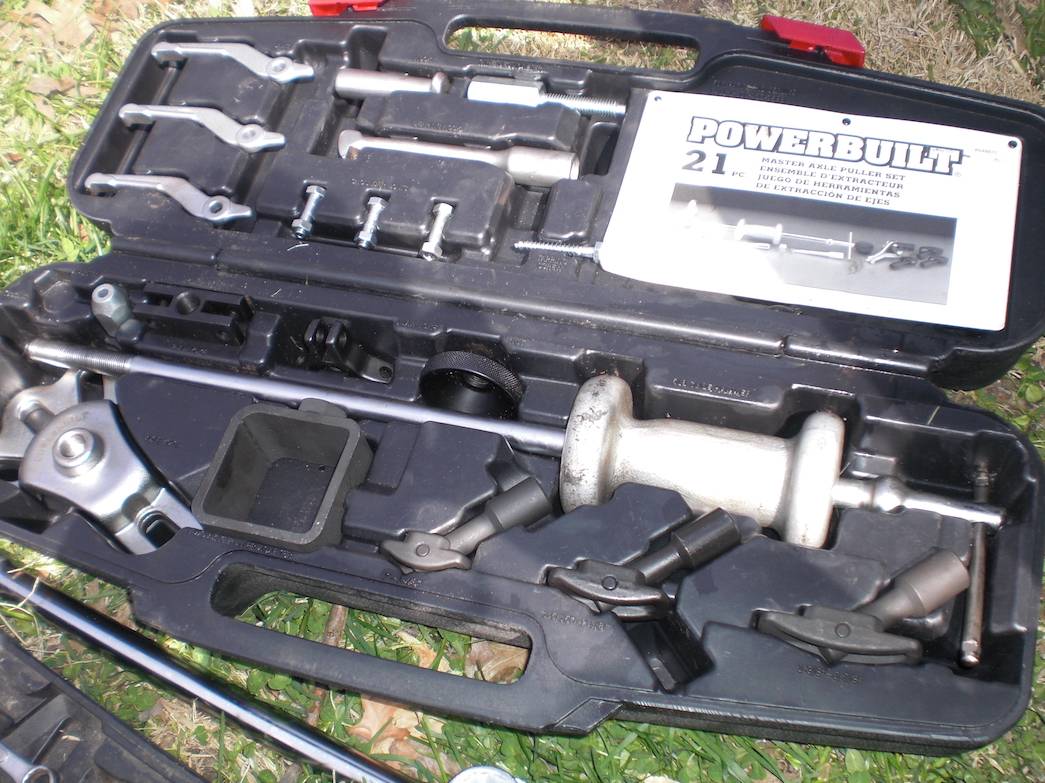
This is what the slide hammer kit looked like. I borrowed mine from Advance Auto, but they should all be pretty similar. Set up the funny metal bracket like so:
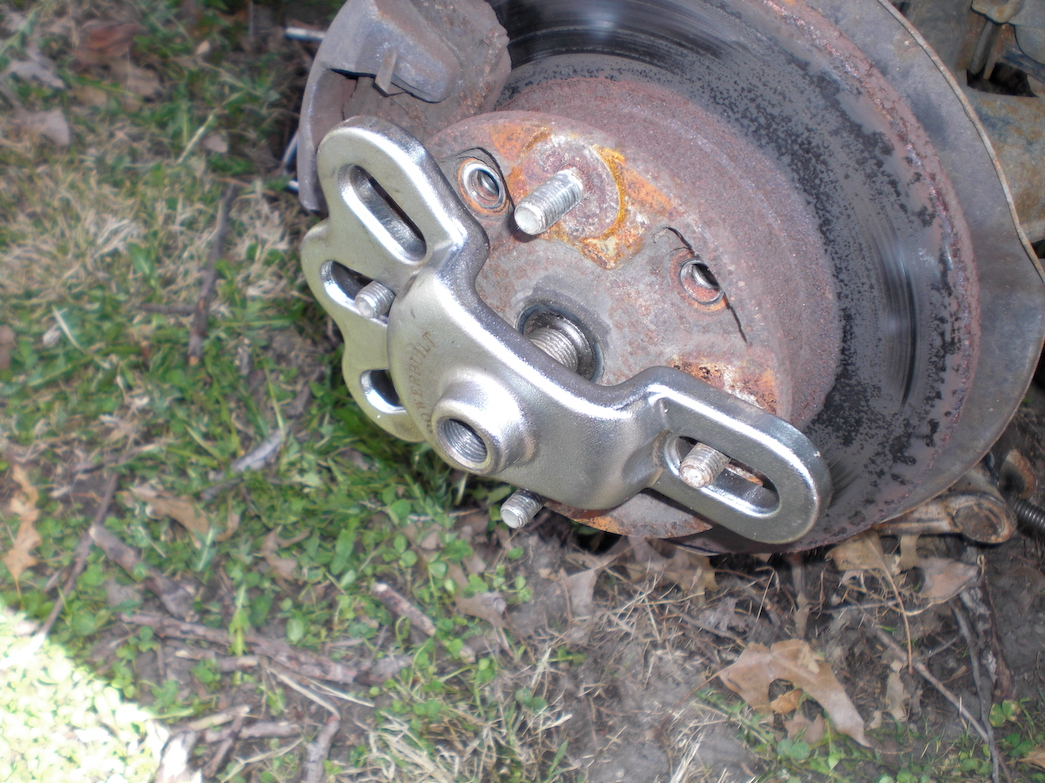
Now attach the two lug nuts, just finger tight:
Make sure that the metal bracket is centered on the drive shaft, that way you don’t accidentally bend anything by pulling it sideways:
Snug up the lug nuts (tire iron or 17mm socket) nice and firm, just like you would when you put the tire on:
Tightening the lug nuts makes sure that they are not impacted with such a high impulse, which would make dents in them:
Now thread on the slide hammer to the plate, making sure that the threads go all the way through:

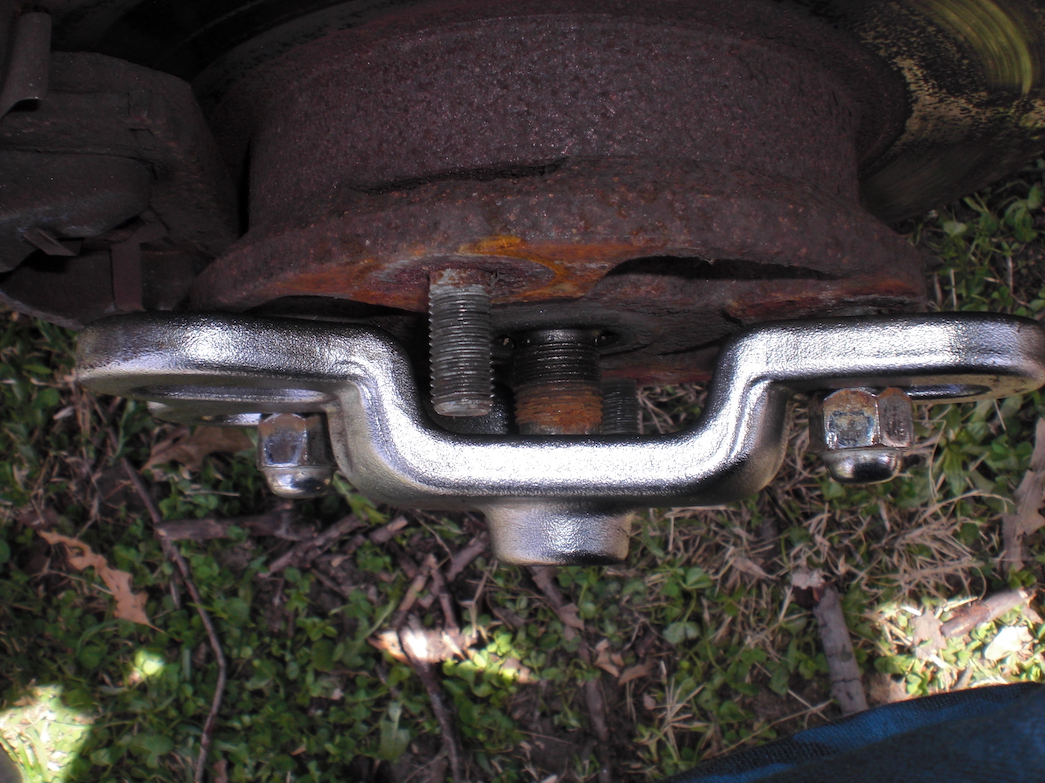
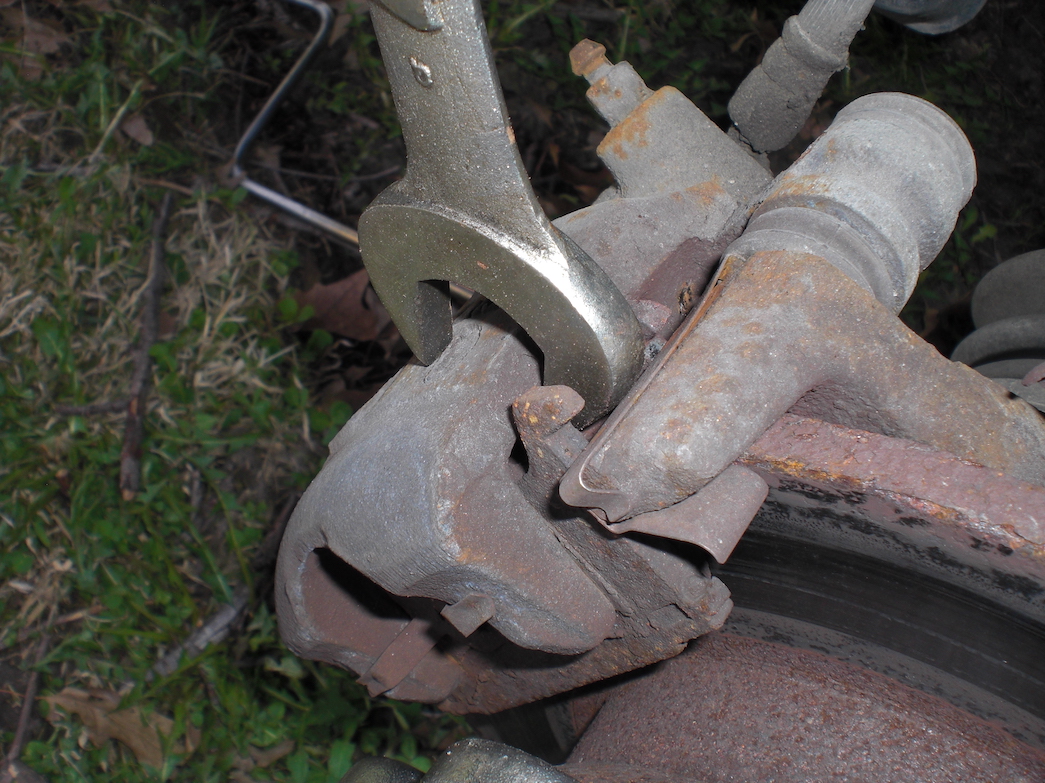
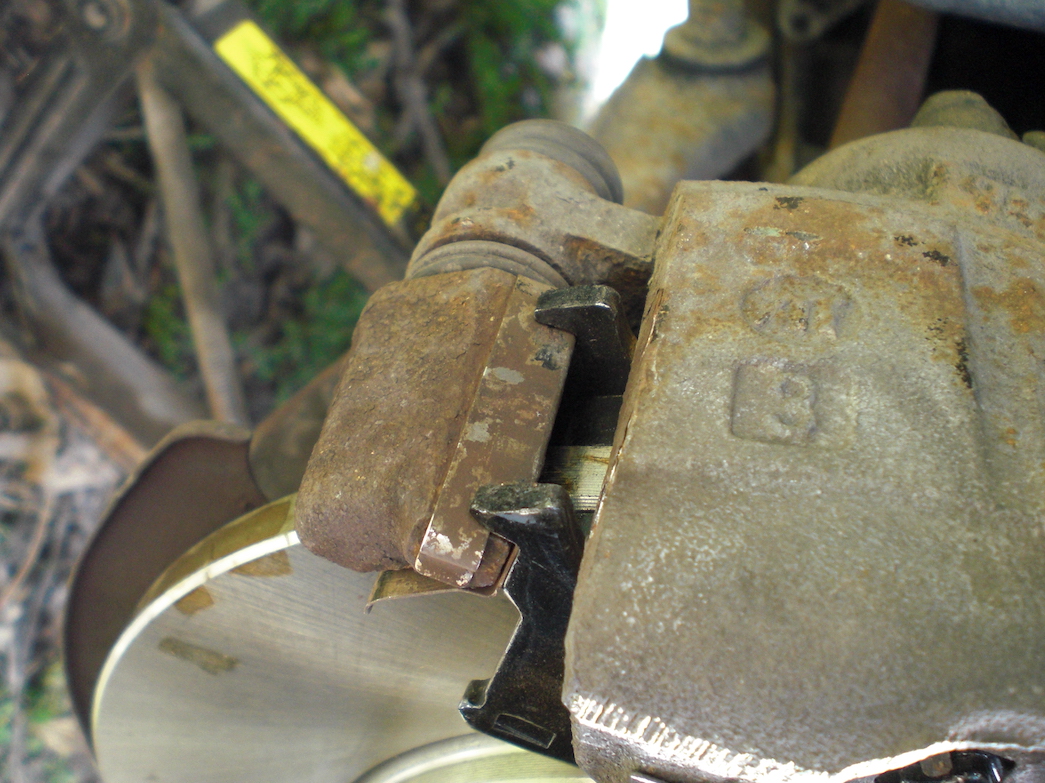
Remove the caliper #
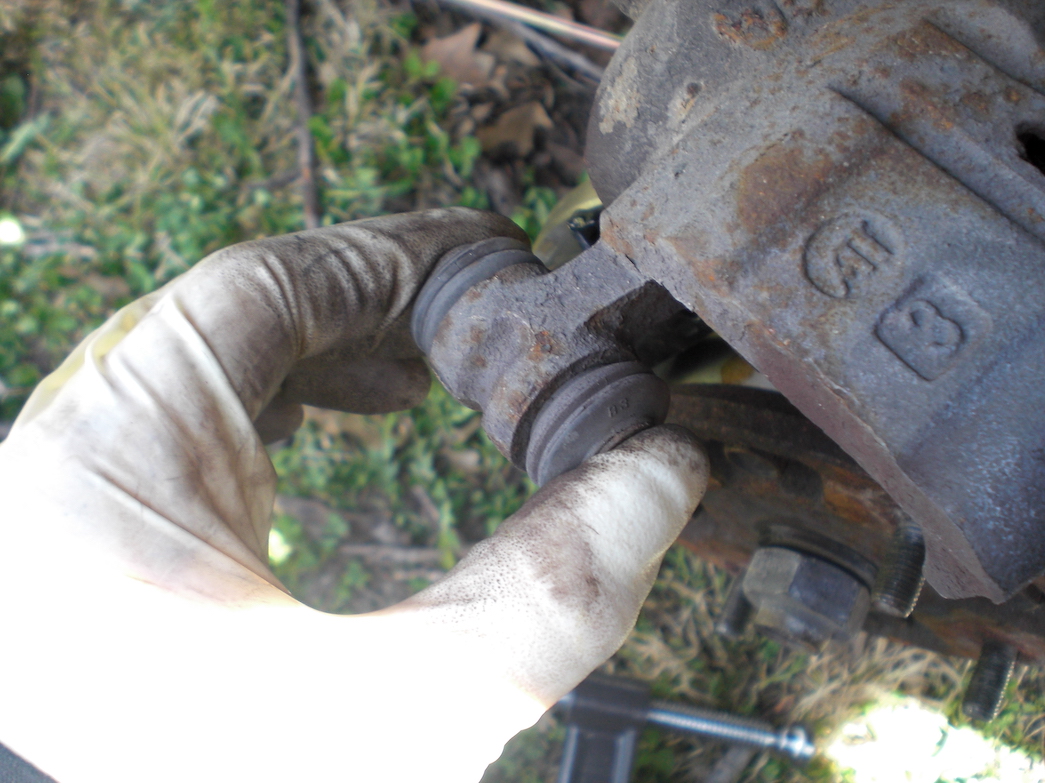
Remove these two nuts using the 12mm socket wrench:
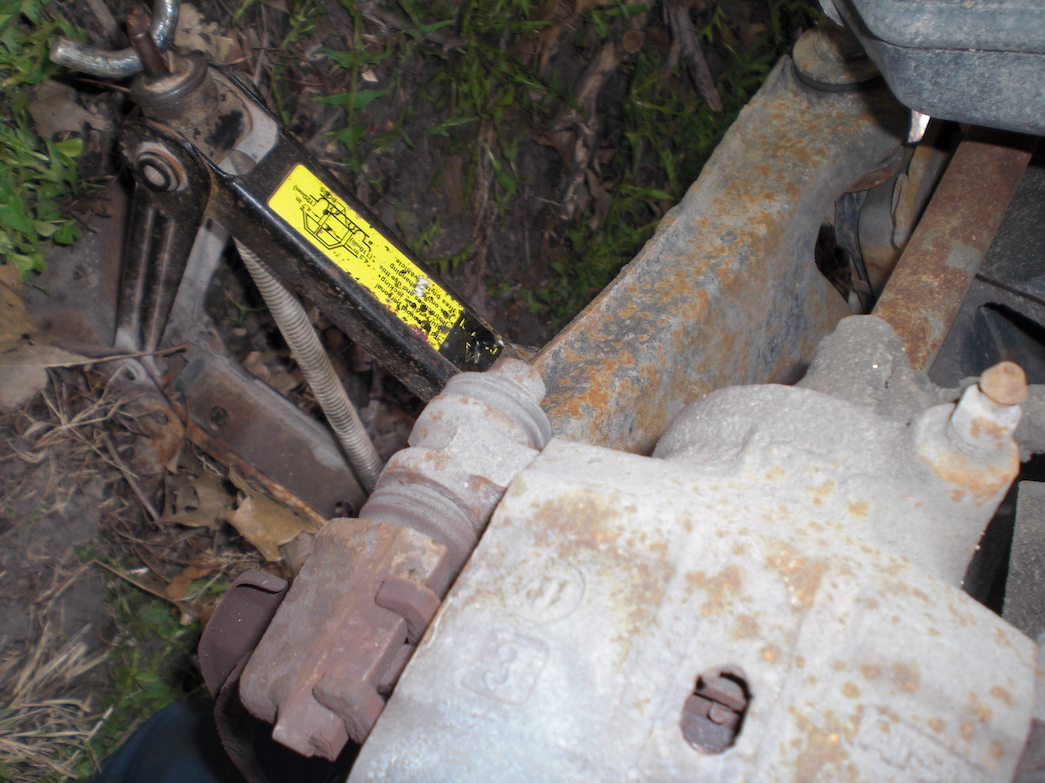
Watch your hands, it’s a tight fit. Also: On the top bolt, make sure your wrench doesn’t hit the brake line, that way you don’t accidentally slam into it when the bolt breaks free:
Leave the caliper on during the next part. This way, in case the bolts are being stubborn and the shaft is turning, you can have somebody step on the brakes and hold it steady.
Now that you are ready, remove the caliper by using a prying thing to pry them off:
Careful to not let it fall, which would stress the brake line hose! Grab the caliper and set it up on top of the brake disc shield, not on the disc itself :)
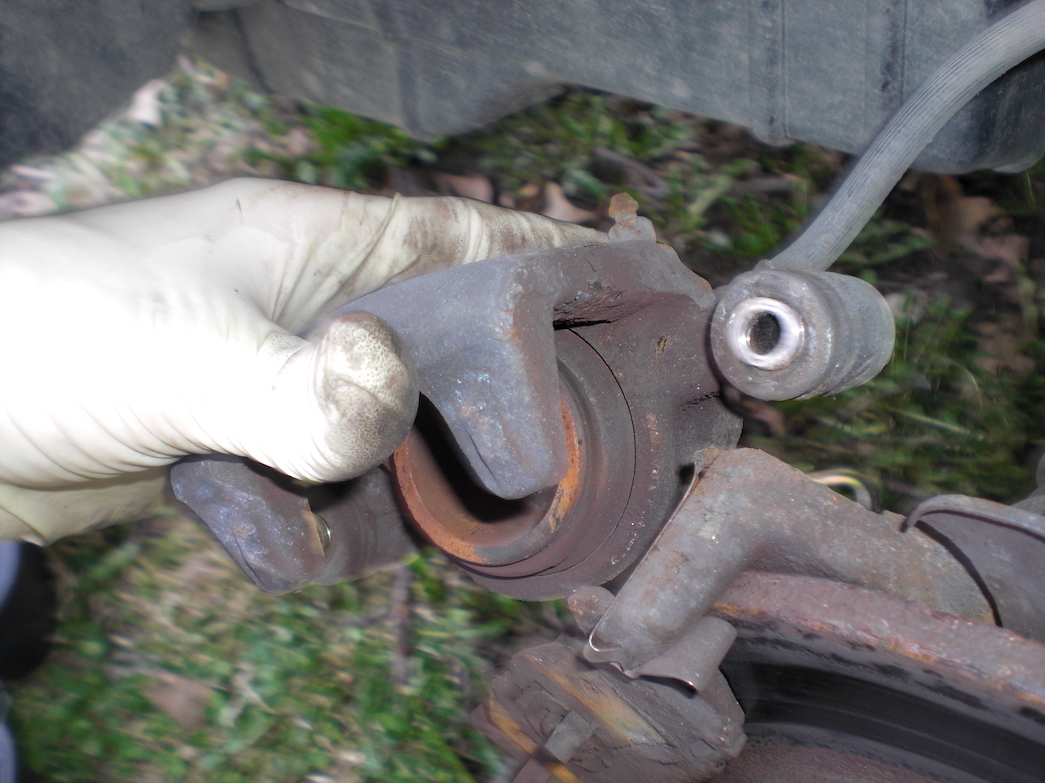
The old pads may fall out, but don’t worry: You’re replacing them!
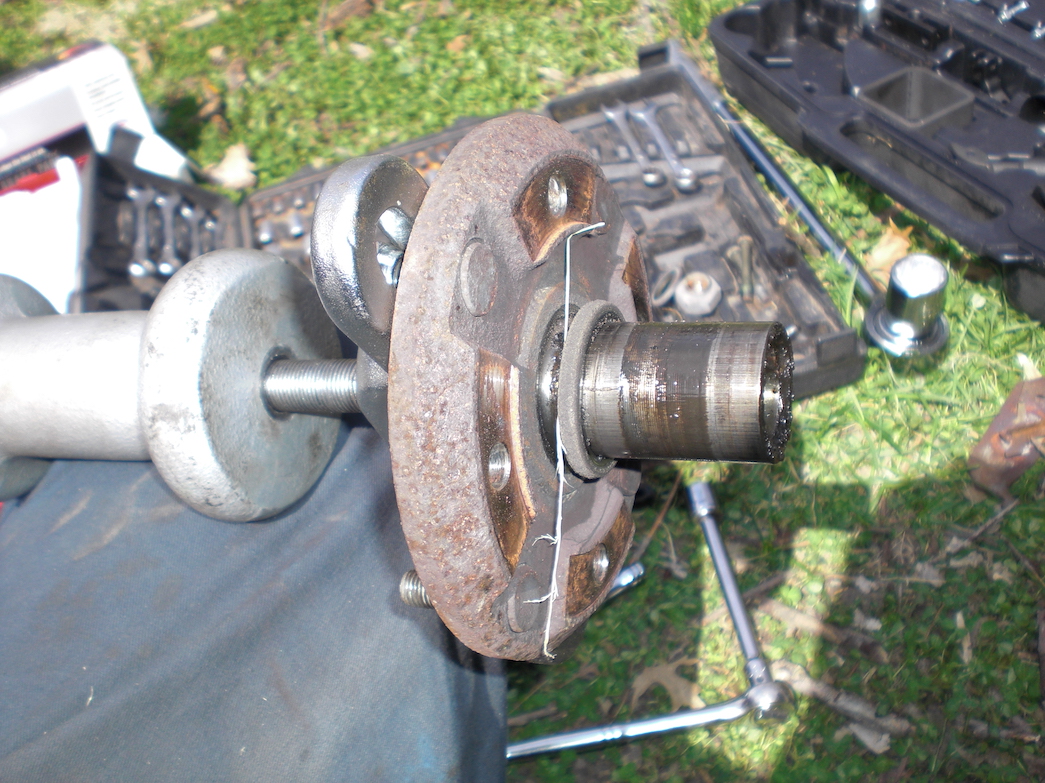
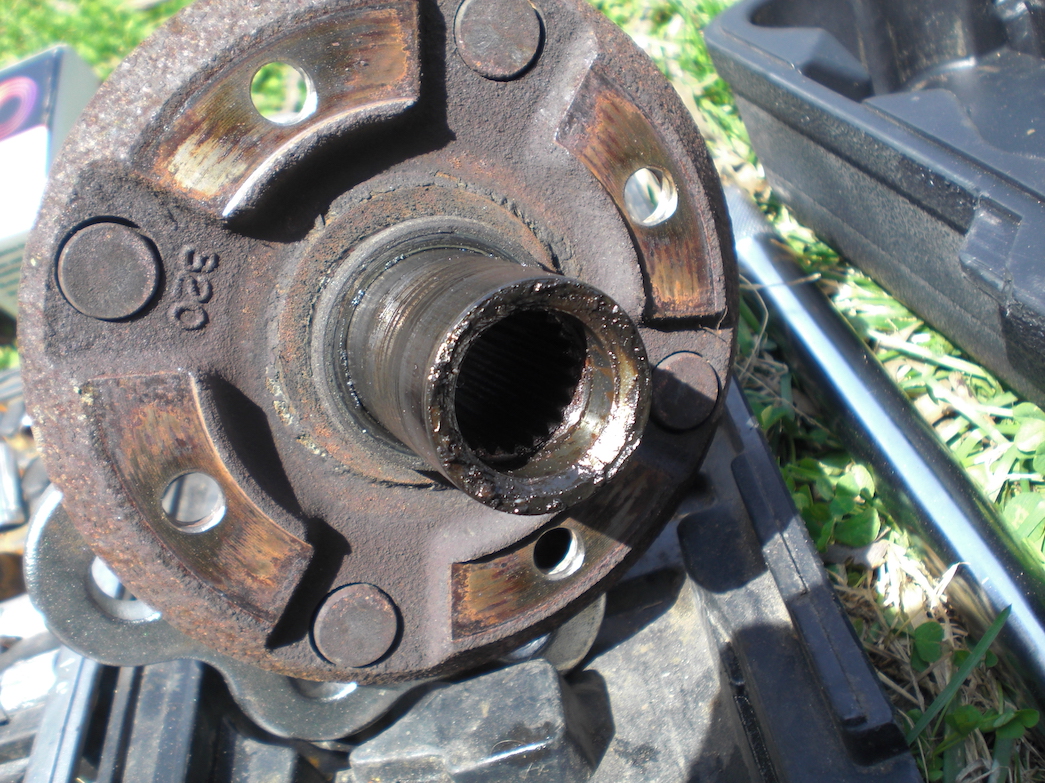
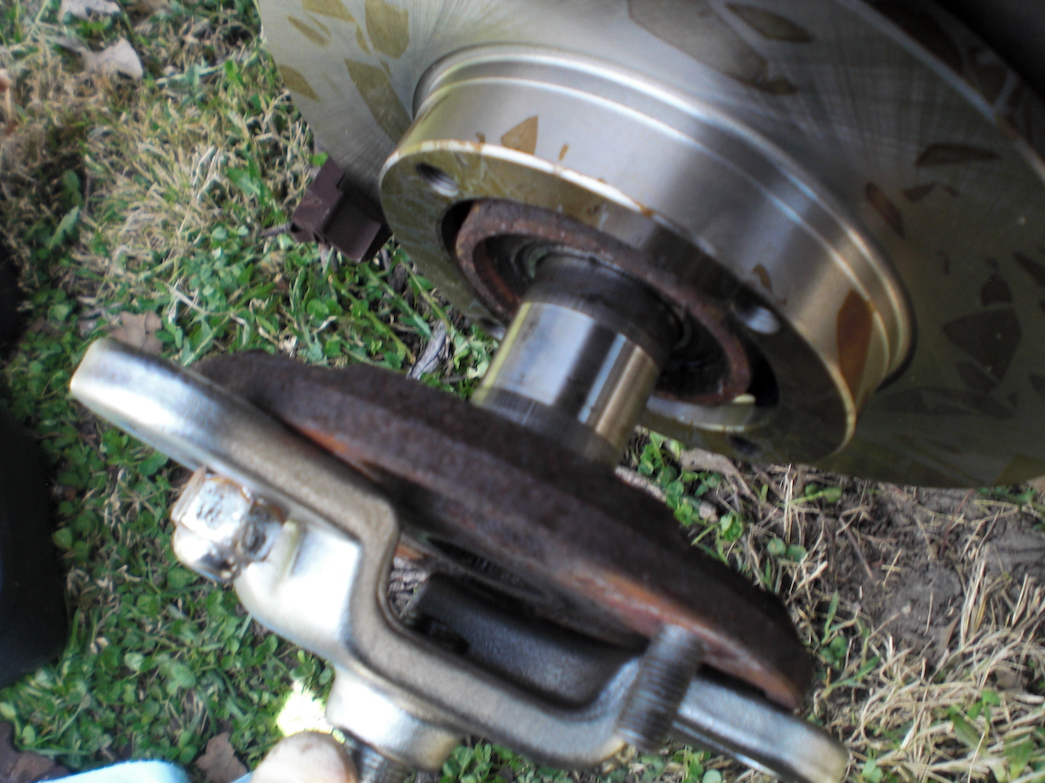
Remove hub using slide hammer #
Using firm motions, slide the hammer from the start to the end. When it impacts the end, don’t let it bounce, which will make the impact less useful.
You don’t need to get crazy here, just use solid hits. It took me about 12 strikes to remove the hub. When it is finally removed, you’ll probably notice a bit of grease on it. Gross! :D
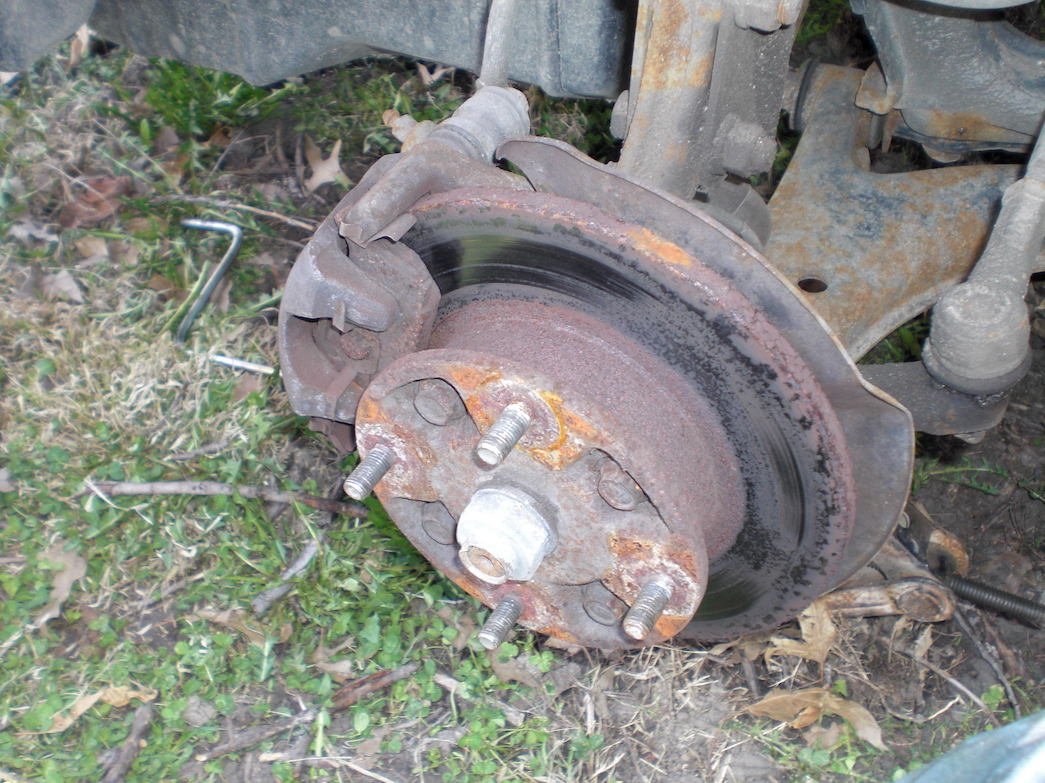
Remove the disc brake #
There’s nothing holding it in, so just lift it out!
Grab the new one and put it back where you found the old:

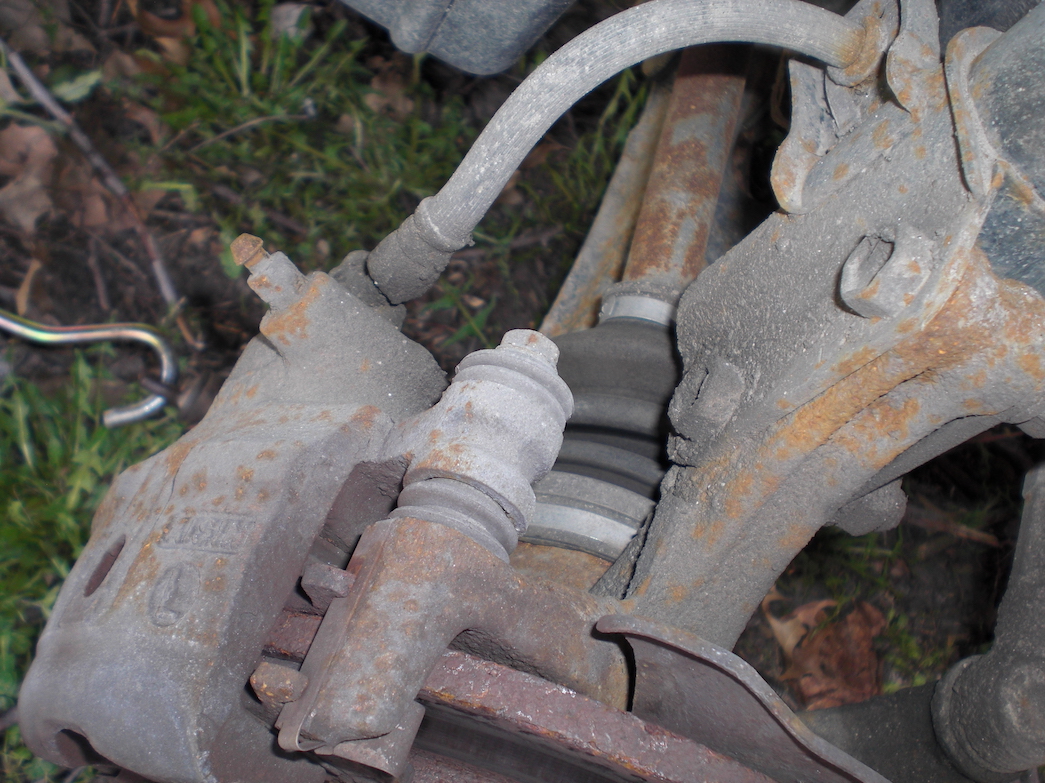
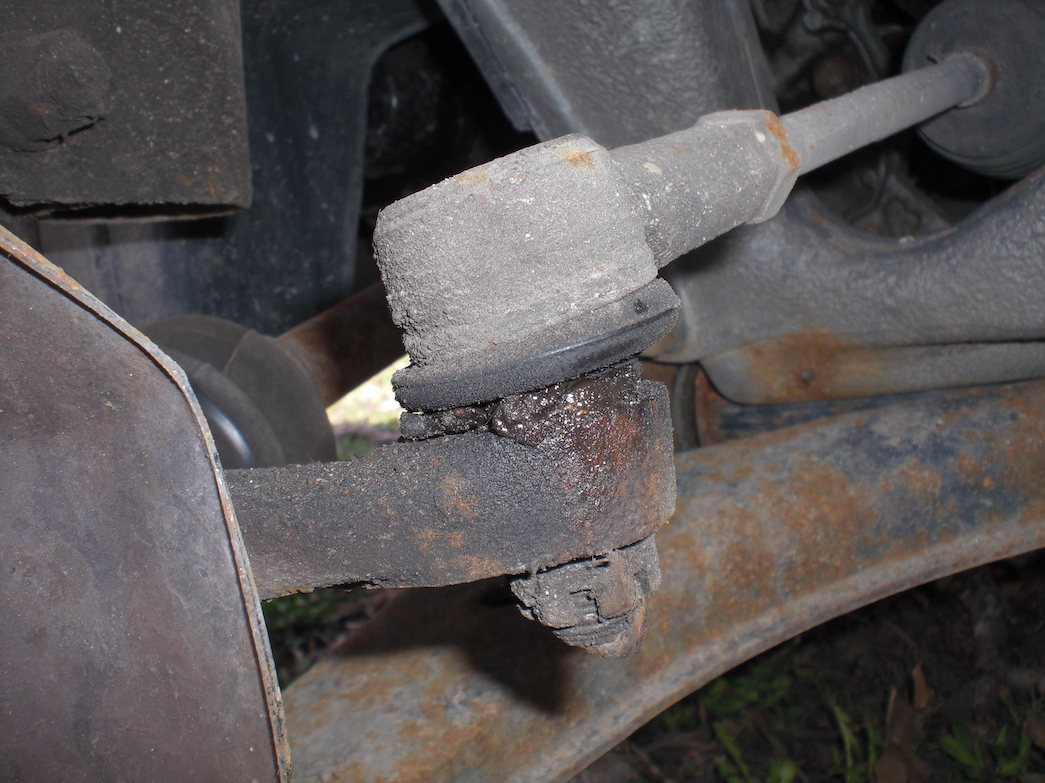
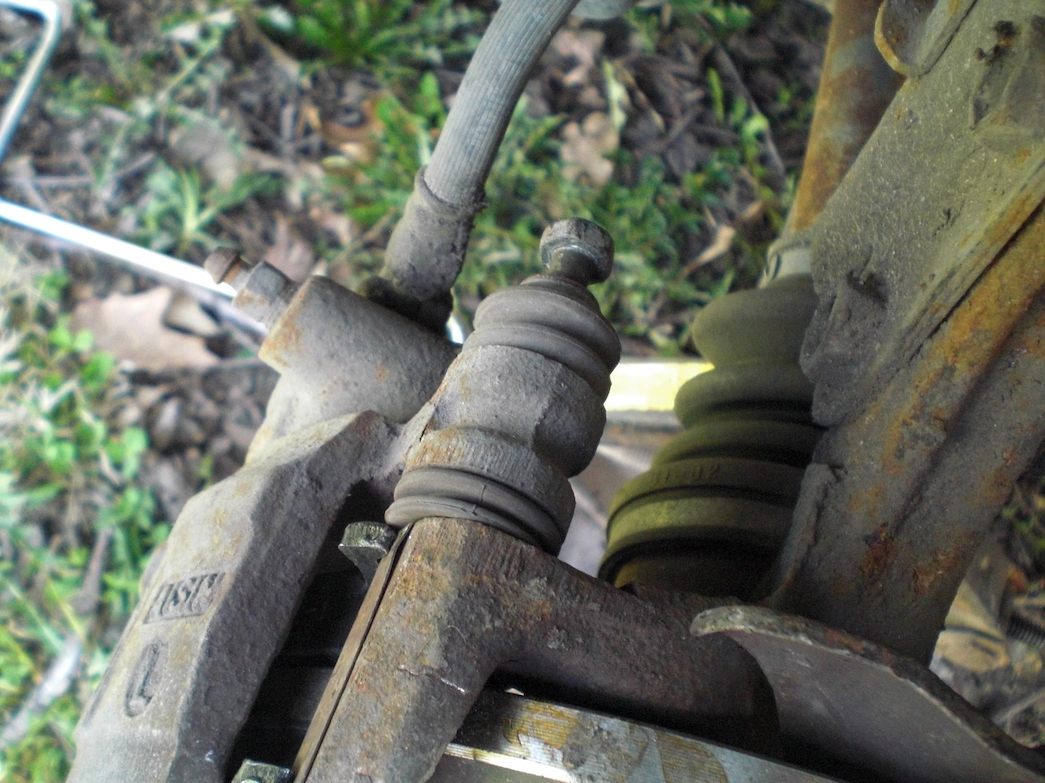
Check out the other stuff #
While you are down here, you might as well look around and see what else is wrong. You don’t need to fix it, but at least you can know how things are doing and plan ahead.
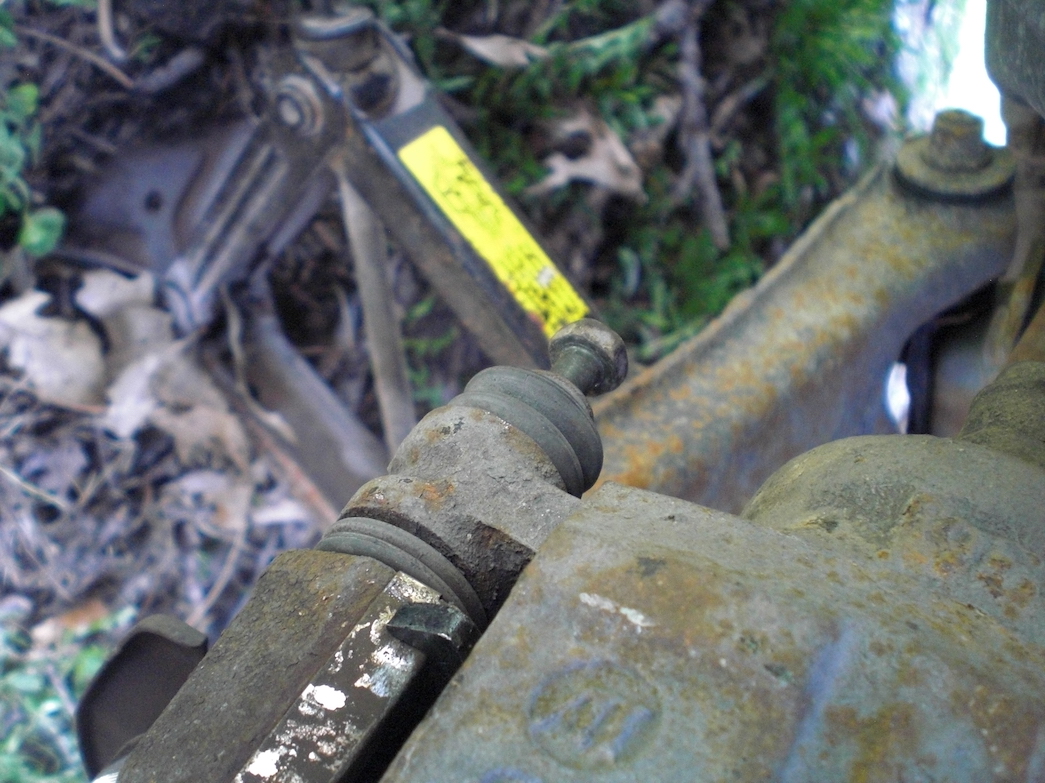
This is a tie-rod end, it looks like the seal is broken. I’ll probably replace that later this summer.
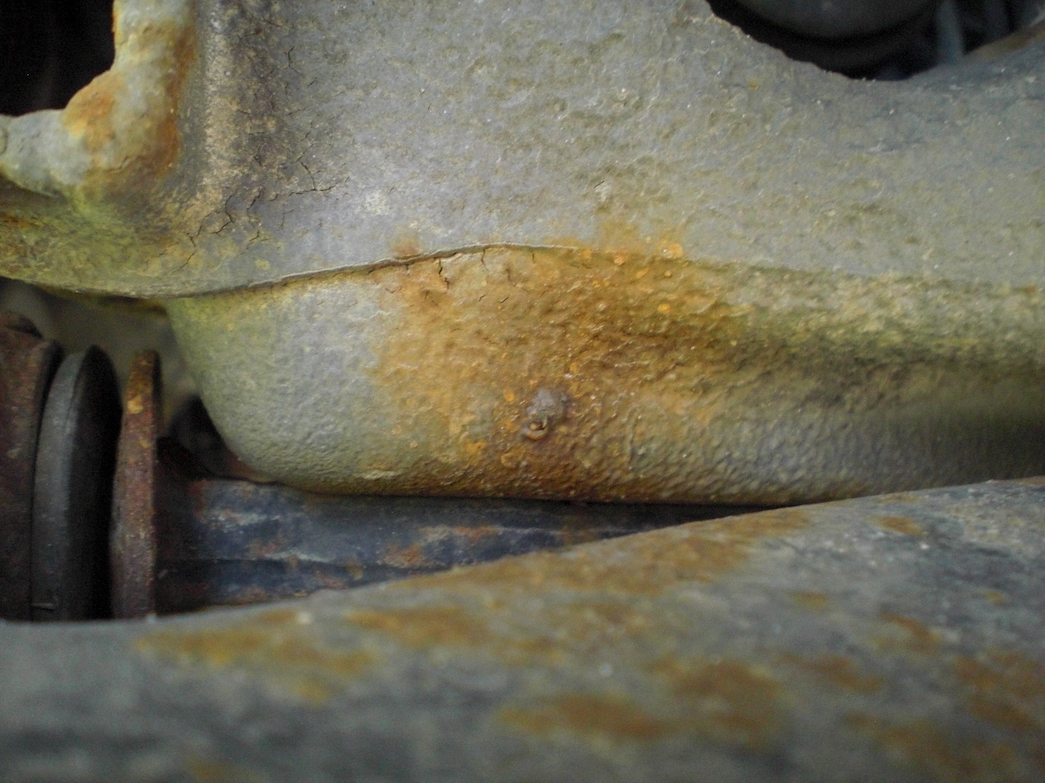
This was a little disheartening: Looks like the Geo has the Rustapox. You know, like Chickenpox? I’ll have to figure out what to do about that, probably this summer before it gets real bad…
Reinstall hub using slide hammer #
It’s basically the reverse of taking it off, but a couple things to note: When you put the hub back on, slide it on by hand and, while pressing in, wiggle it back and forth a little. Once you push it on a little (by hand) the slide hammer should hang there pretty snugly without holding it in place:
You’ll need to make sure the drive shaft is in it’s splines. Don’t skip this step or you run the risk of damaging the CV shaft splines while hammering in the hub!
Using the same firm hammering motion (obviously reversed, to force the hub back in) press the hub back in only a small bit. When this is done, you’ll need to bolt the new disk brake to the hub so you can know how far in to place the hub. Bolt on the disc brake with a couple of the 14mm socket wrench (make them snug, but don’t torque them down fully):
Now finish hammering in the disc/hub assembly until the disc has reached it’s original place. Note: Check your progress every so often, to make sure you aren’t running into anything, especially parts from the caliper!
Remove slide hammer #
Using the tire iron or 17mm socket, remove the lug nuts:
Finish installing discs #
Reinstall the rest of the bolts for the disc rotor using the 14mm socket wrench:
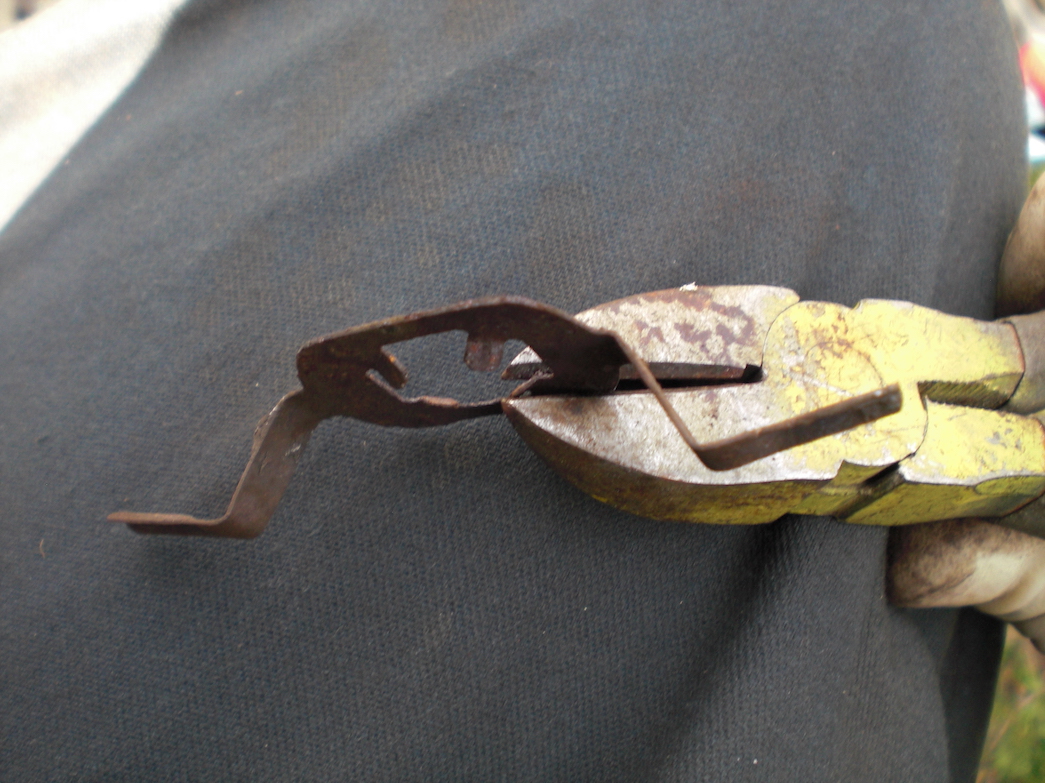
Reassemble the caliper pads #
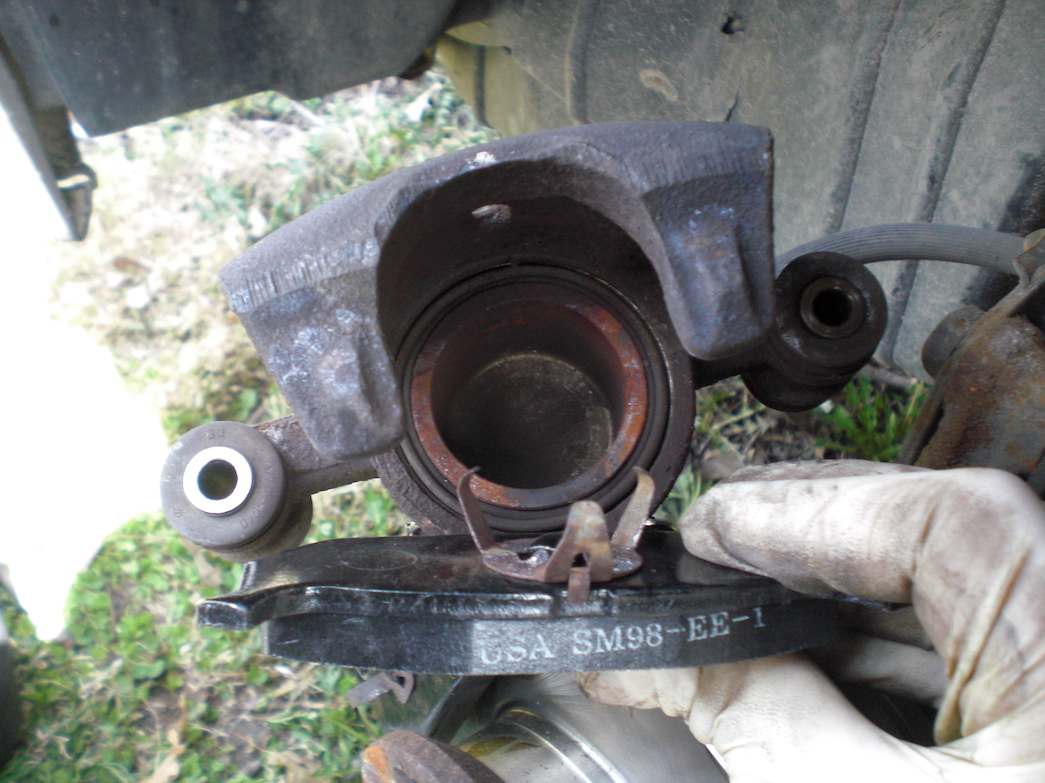
These metal clips may have come off during the removal/install process, so make sure they go back where they are supposed to be. There should be two per side of the car:
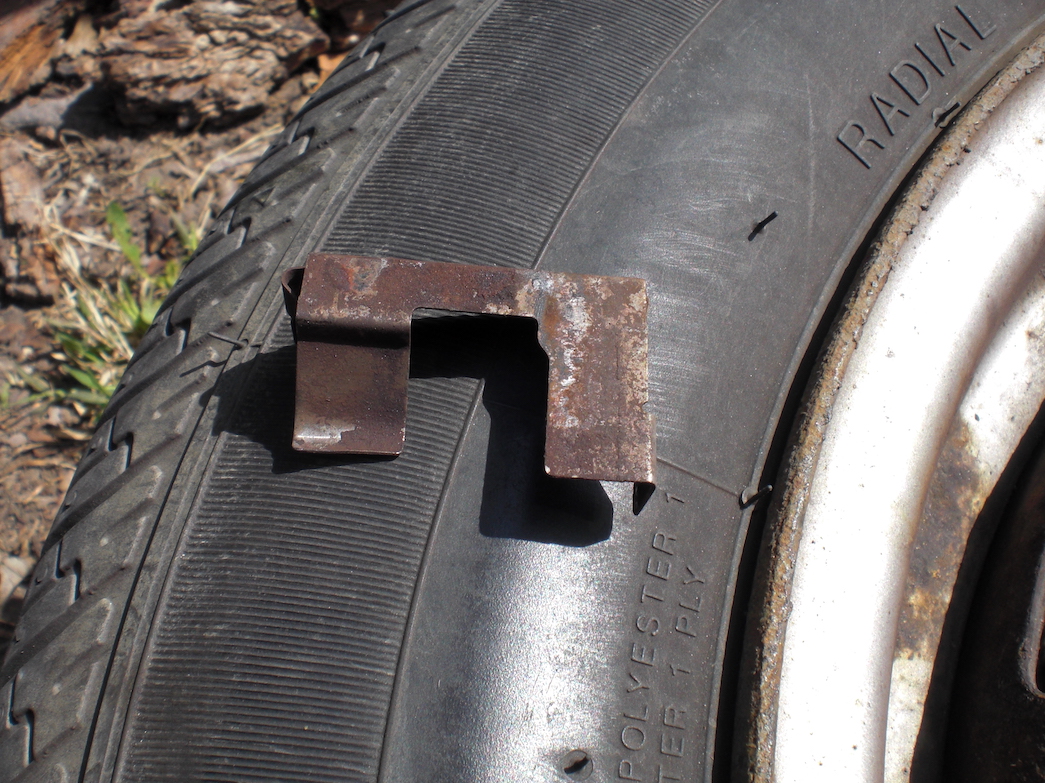
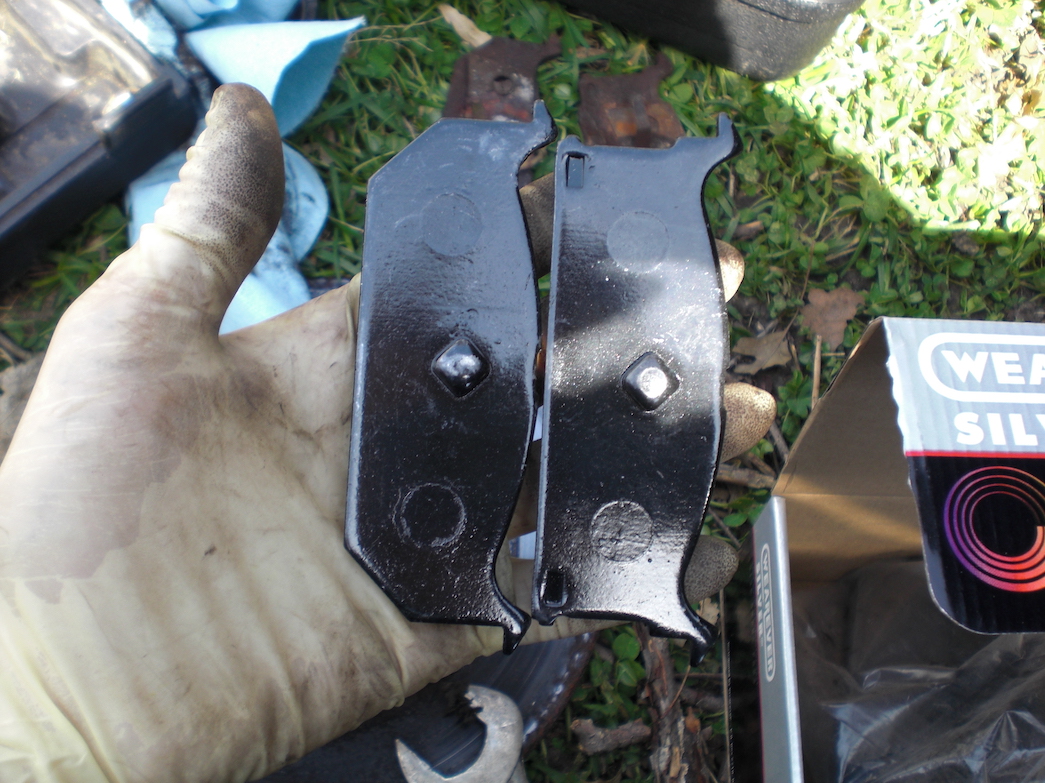
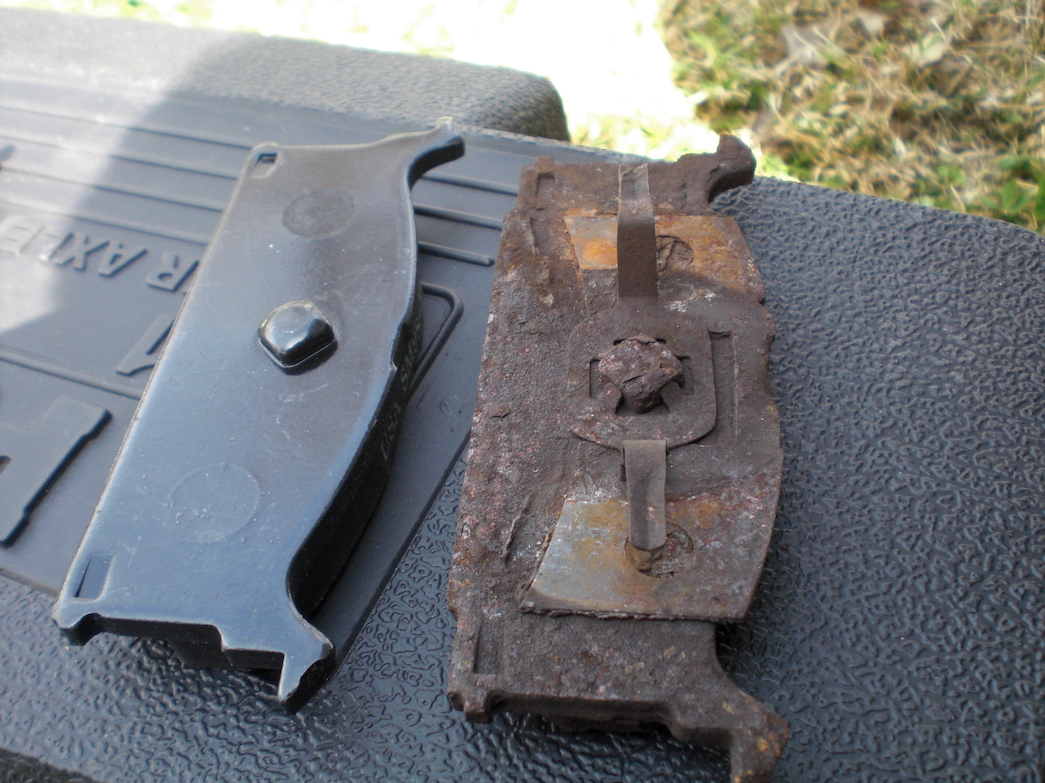
There are two different pads for each set:
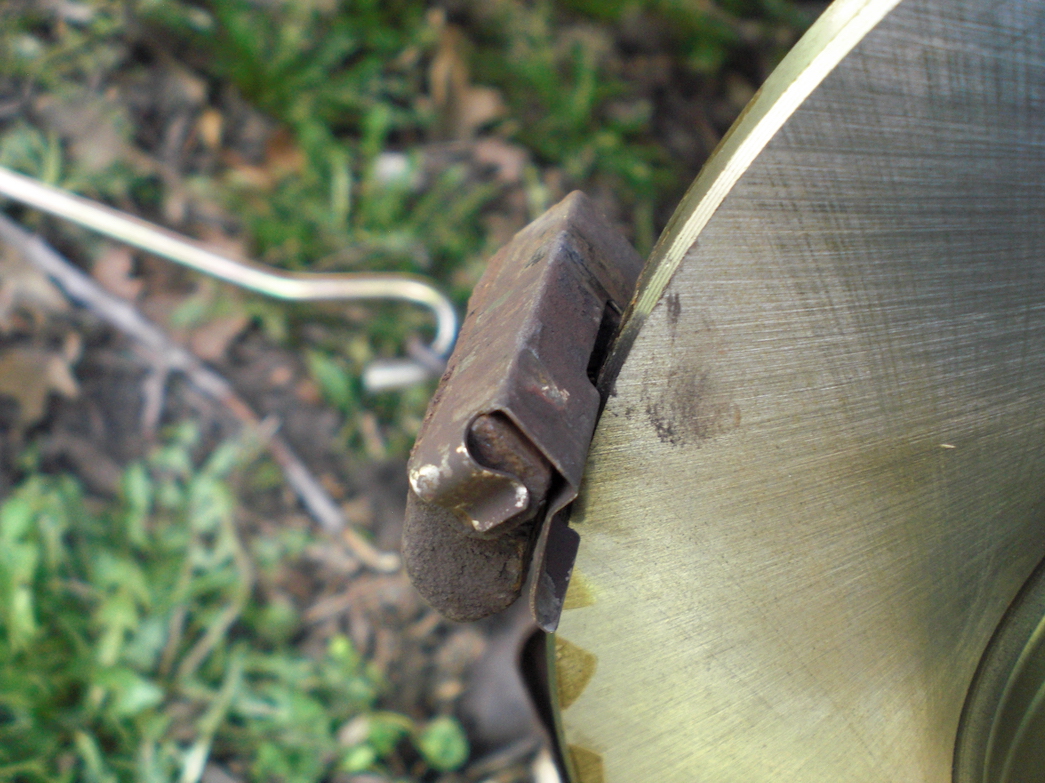
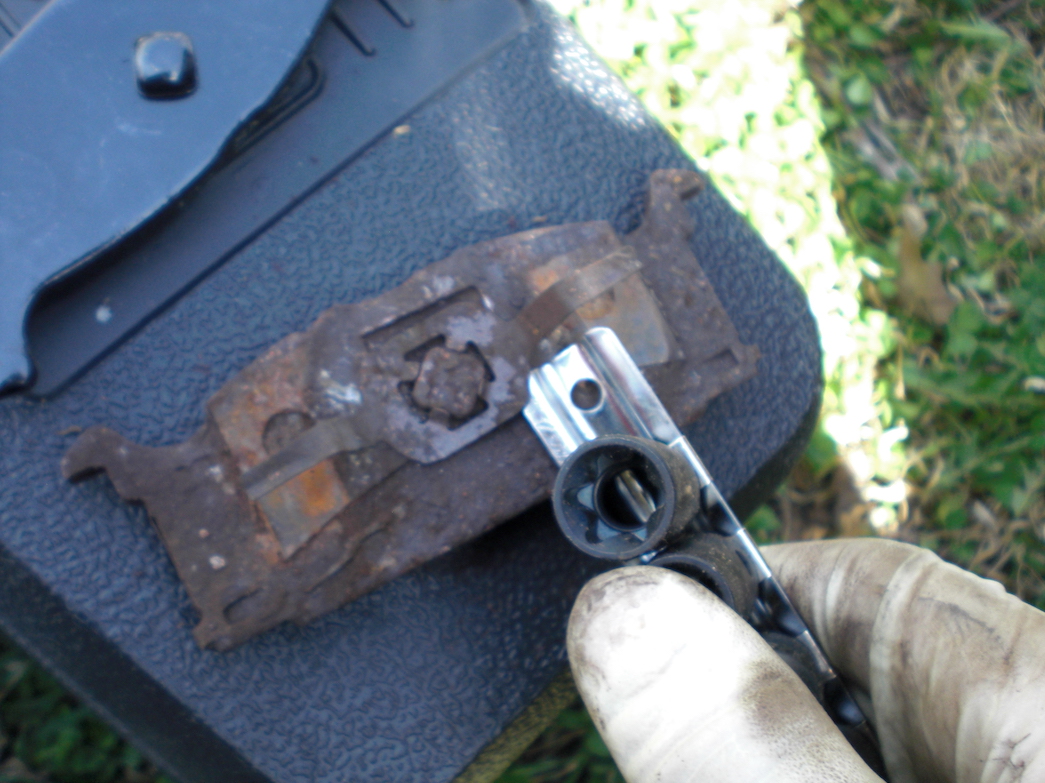
You’ll want to remove these metal clips from the old pads:
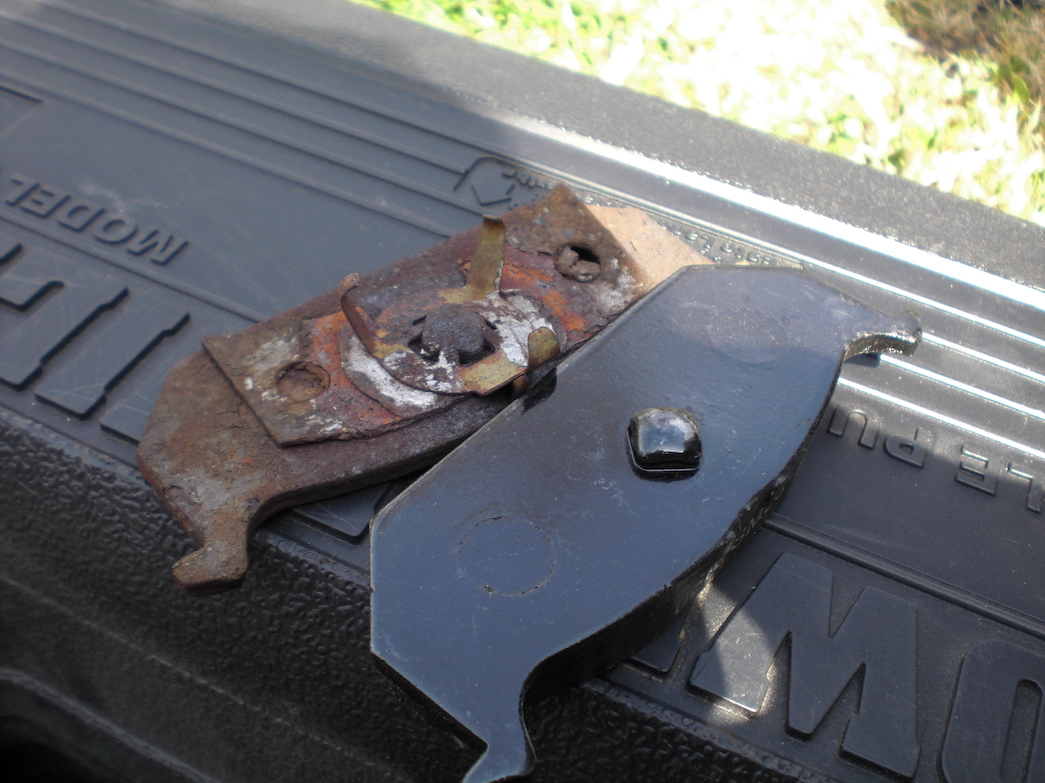
Removing them may require a little care, depending on how rusty they are, so try not to bend them too much. You can use either a thin screwdriver, or some other thin piece of metal to pop them off:
You’ll want to bend those tabs back down a bit, but don’t get carried away–they don’t need to be flat:
To reinstall them, place them on the new pad, place a socket on top of them (the 12mm works fine) and smack them down:
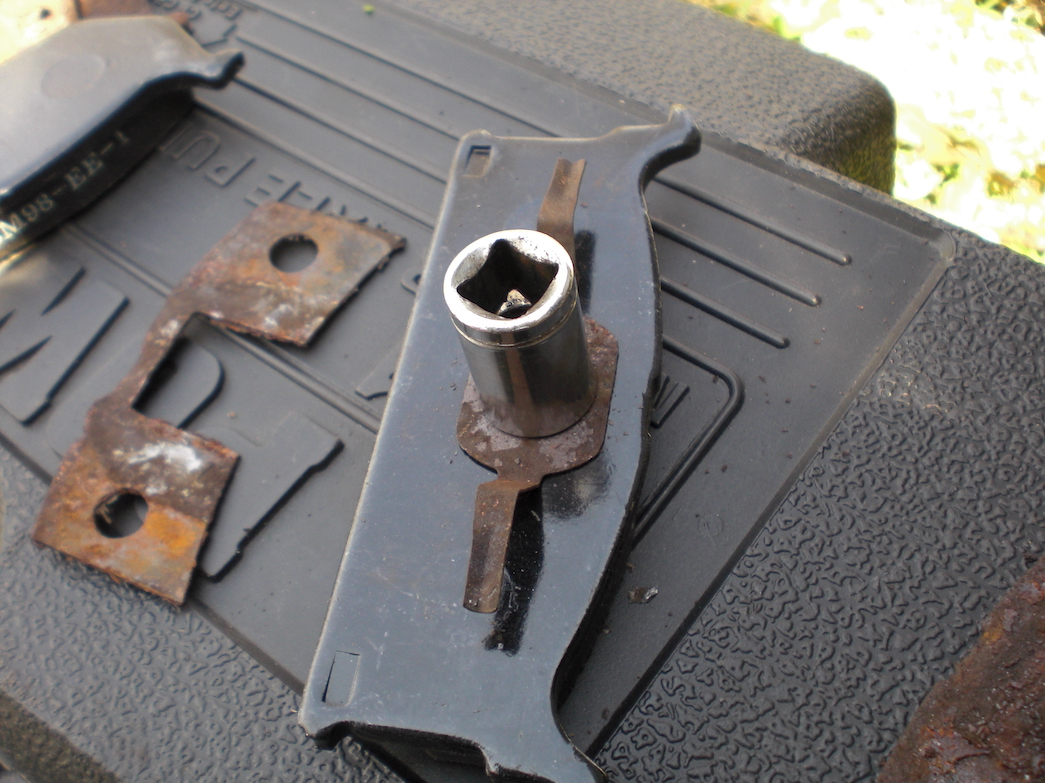
The other brake pad is the same way, but since it has three tabs make sure to put it the right way: There should be a little tab on the underside of the clip which restricts how you can put it on.
Install caliper/pad assembly #
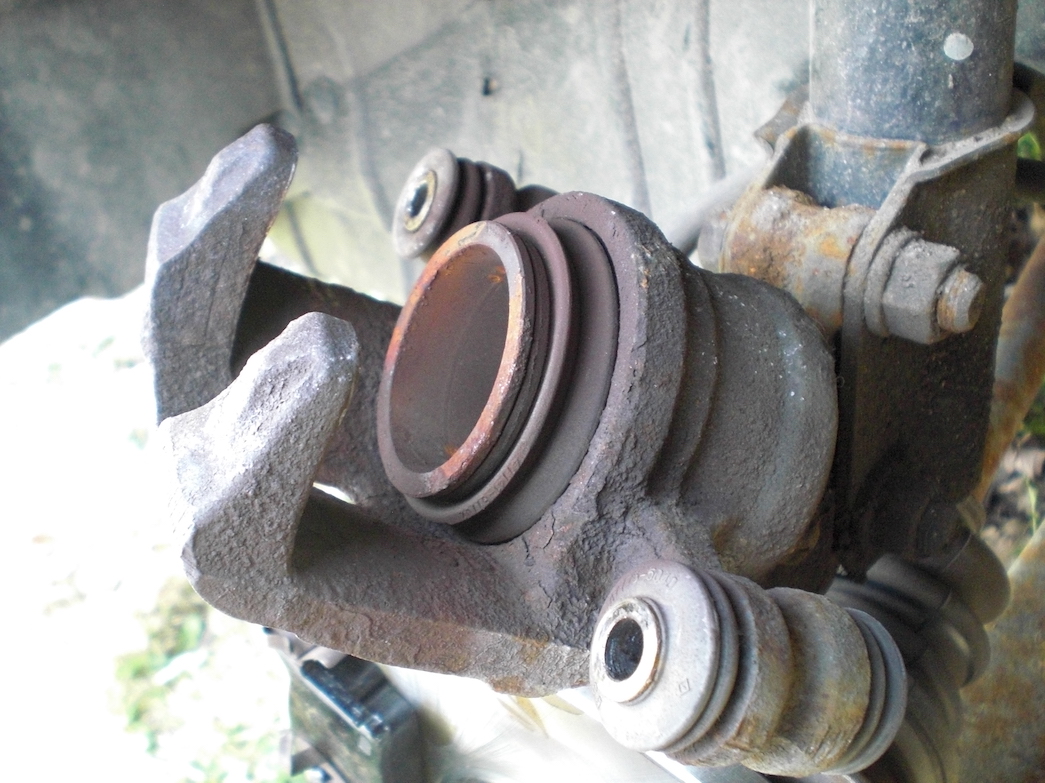
You’ll need to compress the caliper to fit the thicker brake pads, you can see it sticks out pretty far here because mine were worn down so far–just compress it so the piston is level with the casing:

Check that the caliper slides work: Grab them and move them back and forth:
If they don’t slide, you should take them out, clean them, regrease them, and reassemble, probably with new rubber boot seals. I didn’t do that. Instead, I just pressed them as far (up and to the left, as shown in the picture) as possible, with a whole lot of muscle. I’ll have to fix them later…
Press the round-er brake pad clip into the caliper piston. The two tabs go in the “bottom” and the single tab goes in the “top” (as shown):
Now slide the square-er brake pad so the clips grab onto the caliper arms:
Press the pads apart, they should look nice and flashy, like this:
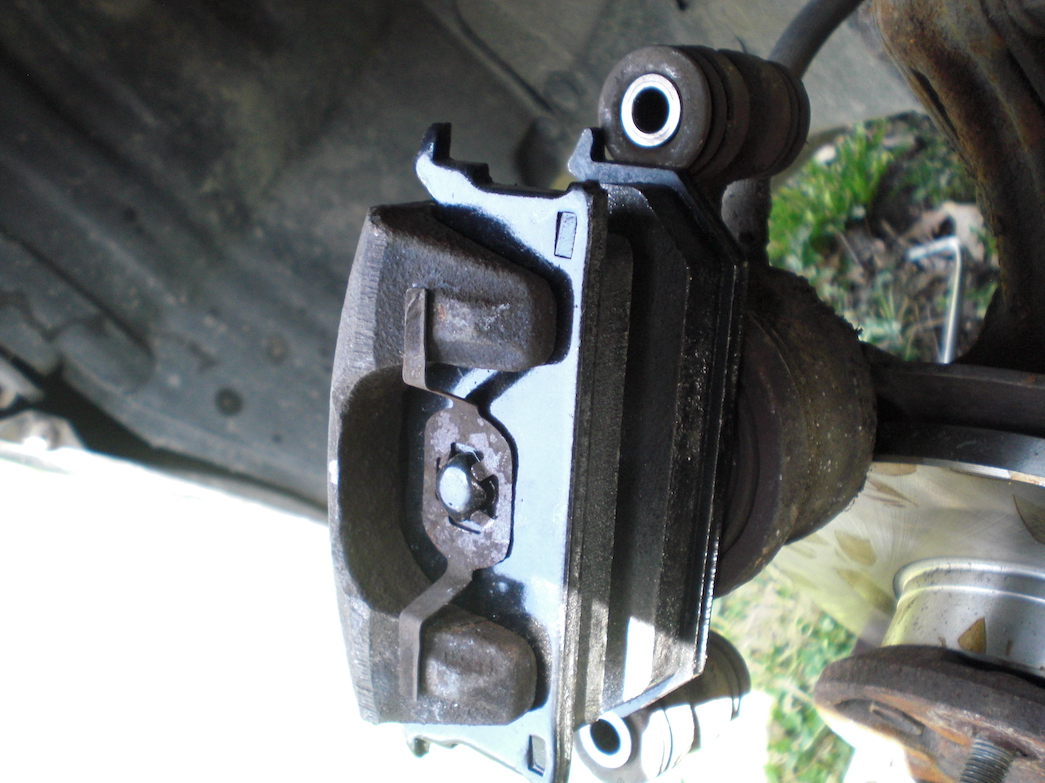
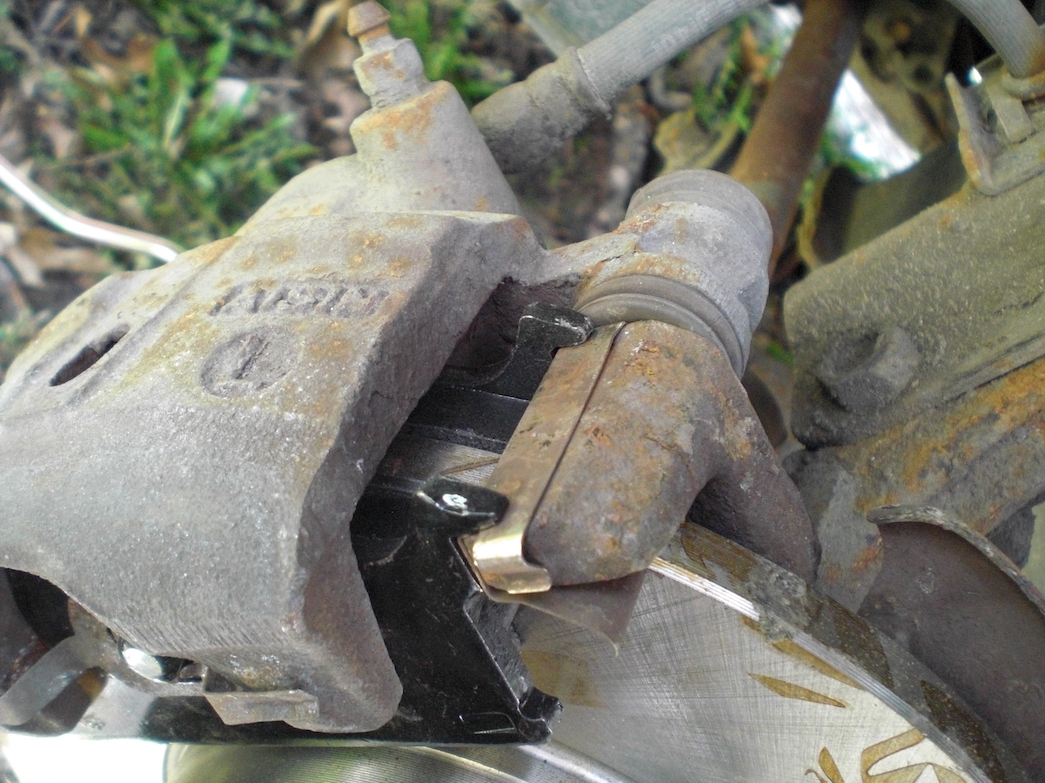
Go ahead and put that whole caliper assembly back on. When you’re done, the brake pads should be settled nicely on the hub arm things, like these:
That part took me some serious effort, mostly because I didn’t fix the caliper slide shafts like I should have. I guess I’m a little lazy :)
Now put the bolts back on with the 12mm socket wrench, make sure to snug them down nice and tight:
Now we’re almost done!
I know this is the part where I start getting in a hurry because I’m so close to being done, but make sure to pause here and double check everything.
Install tire, remove jack #
Put the tire back on and tighten bolts down using the tire iron or the 17mm socket wrench:
Finally, remove the jack:
Install drive shaft nut #
You didn’t forget, did you? Okay, so put that thing on and tighten it down. I’ve heard about a dozen different ways to do this, but this is the one that makes the most sense to me, when I think of the elasticity of materials and all that: Tighten the thing down tight! The official manual says to tighten the nut to 175 Nm, which is 129 Lbft. Basically that means that if the wrench is a foot long, you’ll need to put 129 pounds on the end of it.
I put my full weight on it. Once you do that, turn the nut back by about 30 to 45 degrees. It should still be plenty tight when you do this.
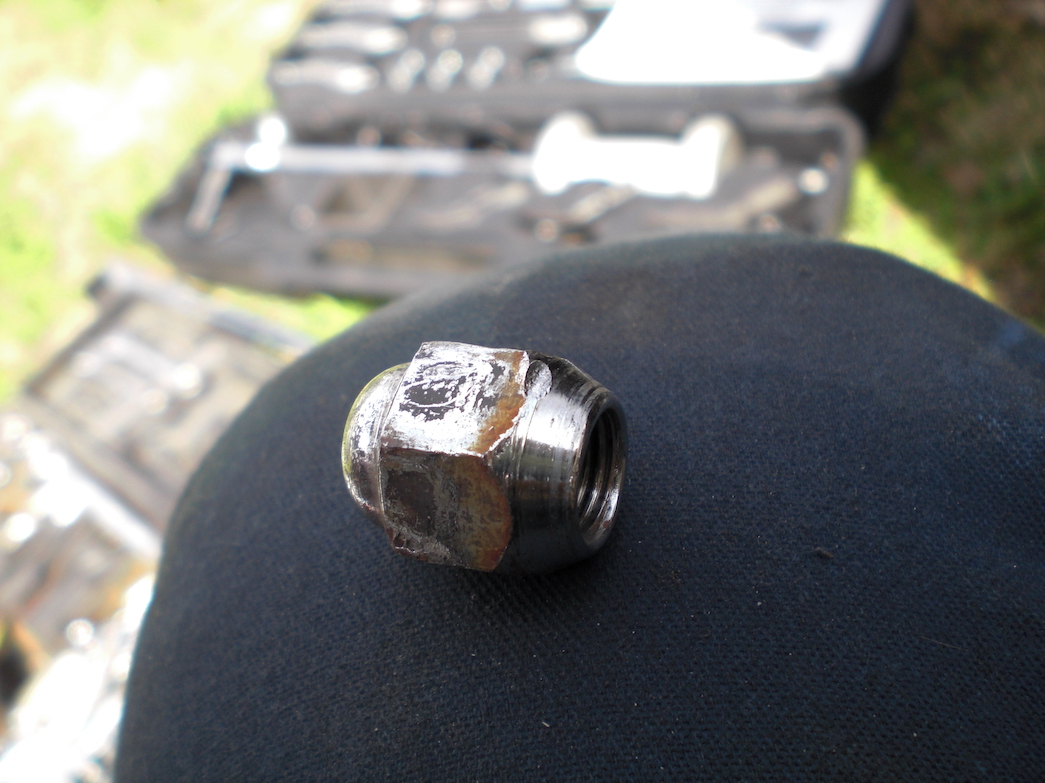
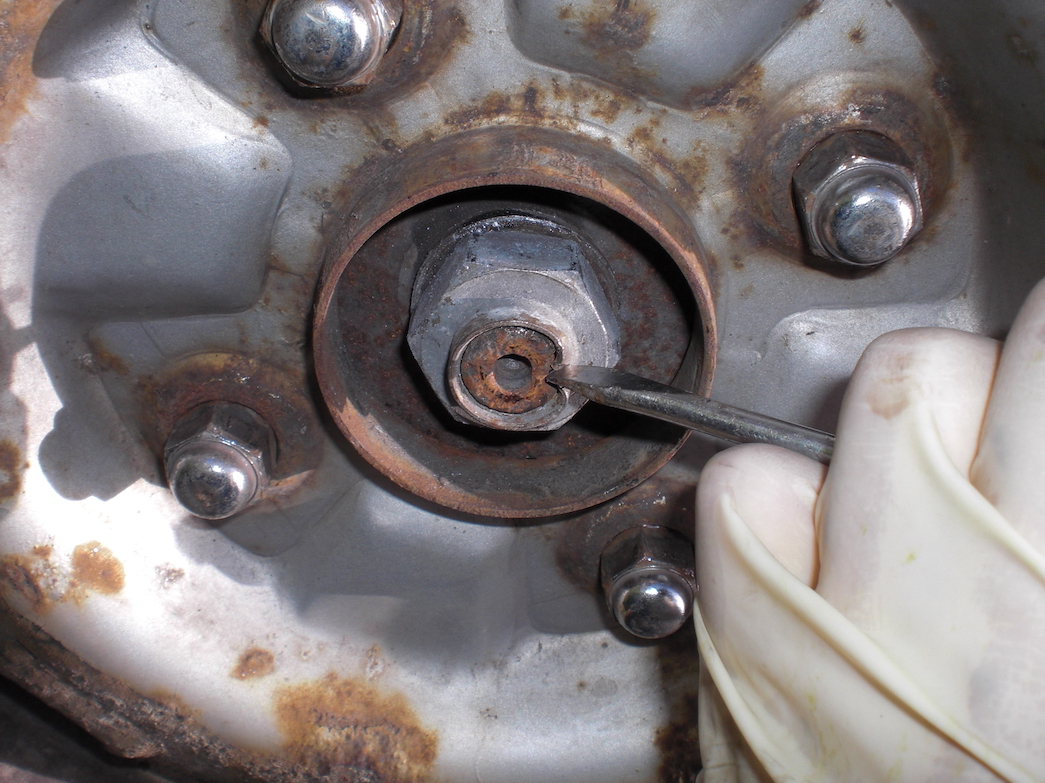
Finally, we need to secure the nut, so take the hammer and screwdriver and look closely at the nut:
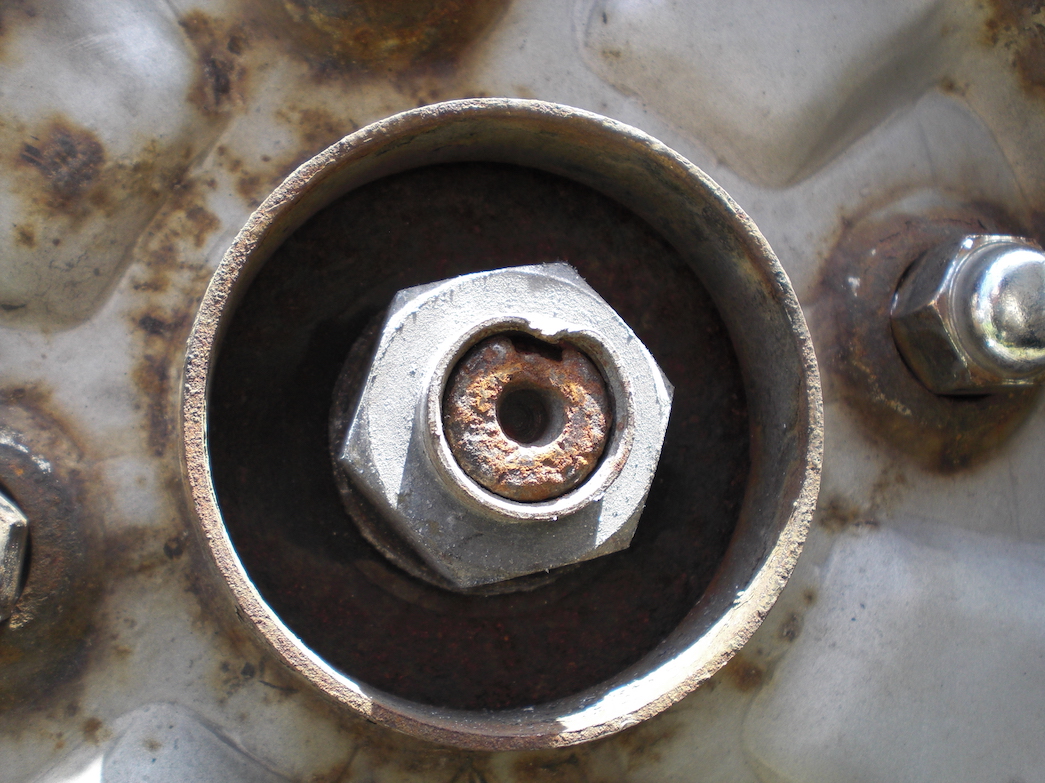
You may need to zoom in on the second one to see what I’m talking about. The nut is already deformed from before, it is only coincidental that it is deformed in the same spot. The shaft has a small groove notched in it. You basically need to fold the metal of the nut into that groove to keep the nut from turning. Take the hammer and screwdriver, and tap the metal into the groove (it shouldn’t take much):
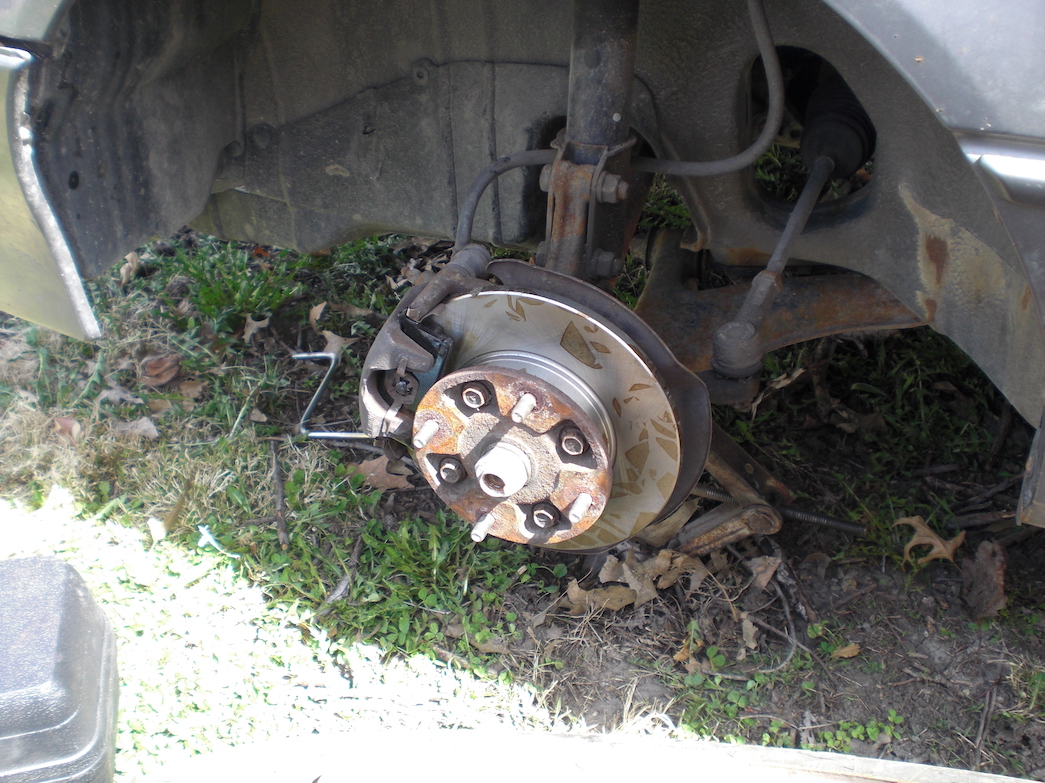
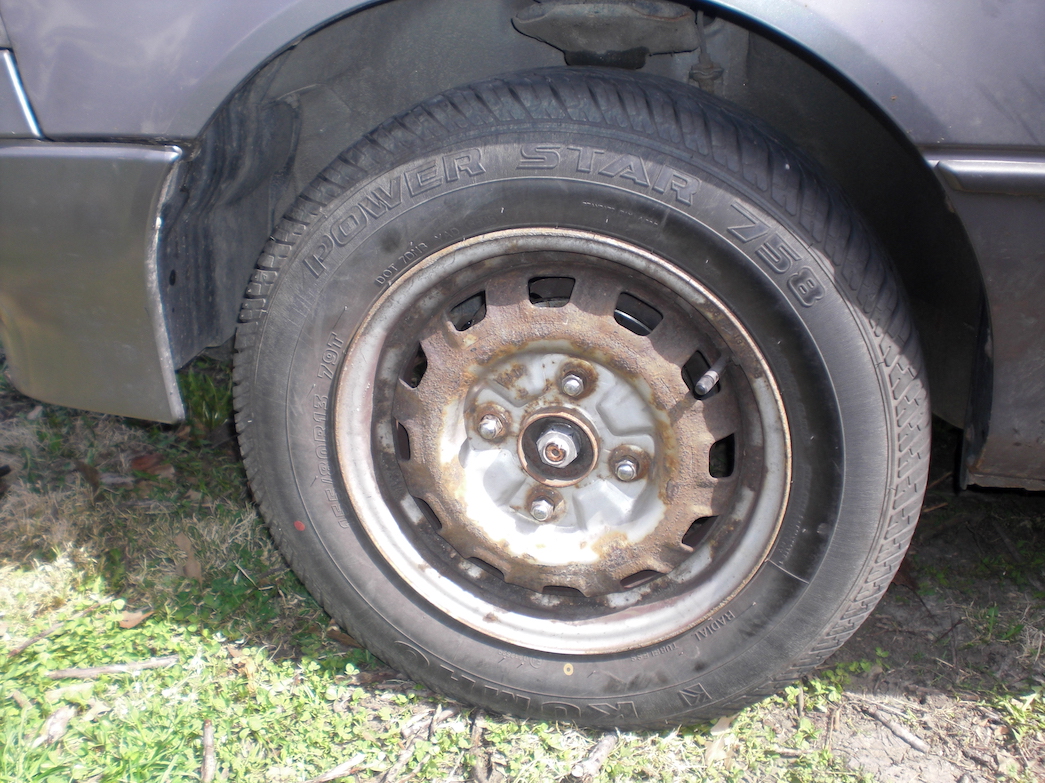
Done! #
And there you go, a nice new disc brake and pads installed:
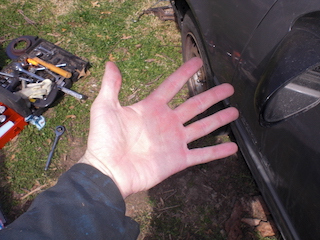
Now I told you that you ought to buy some latex work gloves earlier, so here’s a picture of my hand after I pulled off the glove. I didn’t even wipe my hand on my pants or anything (my pants would have made my hand dirtier :lol: ):
And that’s it! Thanks for reading, I hope these instructions helped you!